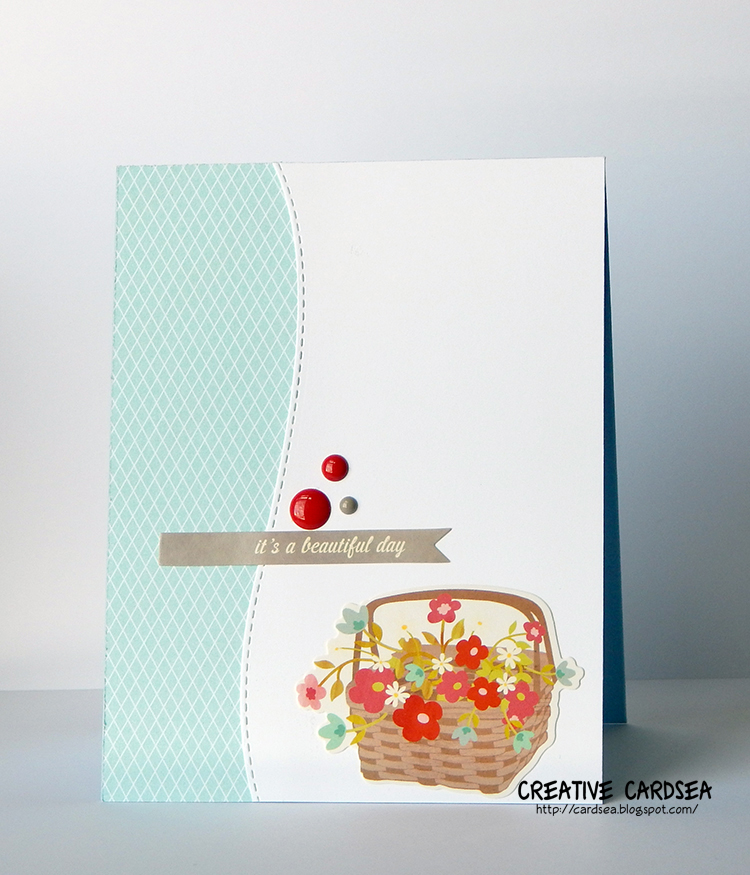
As you may have noticed, I took an extended break from sharing cards over the past couple of months. It was for what I'd like to think of as very joyful reasons - a trip to Canada to visit my parents and brother, hosting birthday parties and dinner parties for friends and family, and a slew of activities and adventures that kept the whole family fully enjoying the season.
Now that we're settling back into our familiar family routine, I'm ready to head into my crafty space again. We're still a little time away from Christmas, but fall is nipping at our toes already. I feel a little bit rusty, but I'm eager to create cards for the upcoming holiday season.
Thanks for reading!
~Elle~
Showing posts with label Sweet Stamp Shop. Show all posts
Monday, September 2, 2019
Friday, July 29, 2016
Birthday Ballet & More Unicorns
My Favorite Things - BB Birthday Bears, Penny Black - Sweet and Cute, My Favorite Things - Chevron Cover Up
It's Friday, and Fridays make me feel happy. Maybe it's because it's generally my quiet workday, or maybe it's the promise of a potentially relaxing weekend, but I quite like Fridays.
And on this Friday, I'm sharing another birthday card. It features a sweet ballerina mouse from Penny Black and a large cover-up die from My Favorite Things. I have a few of these cover up dies - basic shapes like polka dots, stripes and chevrons. But for some reason, I used to find them difficult to use.
While they do cover up quite a bit of patterned paper, the problem was that I used the wrong kind of pattern. Anything too complicated of too large would look really fragmented and out of place. But using the miniature patterns from Doodlebug papers is just perfect! The cover up actually breaks up the pattern enough so it's not too overbearing.
Just look at it in action again:
Sweet Stamp Shop - Unicorn, The Alleyway Stamps - Lighter than Air (retired).
I feel like I stumbled upon the winning formula, there, and I'm going to go through my Doodlebug supplies again to see if I can match them with one of the cover-ups.
Thanks for reading!
~Elle~
Tuesday, July 26, 2016
Golden Frog Celebrate
Instead of looking at fun designs, I caught myself researching the stamps they were using, or the dies, or the technique that's going to require 50 new tools. Suddenly, there were all these new "CRAFTY NEEDs" and a pattern of giving myself negative feelings. I'd be sad that I can't buy that super cute stamp or annoyed that I don't have 20 spare hours to make that technique work perfectly. And that's the exact opposite of what I want for myself when it comes to crafting.
So, I unsubscribed. I deleted the links out of my bookmarks and reminded myself once again of what I wanted to do and how I wanted to feel. I want to be inspired by what I have instead of what I want. I used to say "need", but it's not really a need when I can make without it. So, I don't need to know what others are doing - I just need to know how my happy crafty stash will inspire me today.
And today, it inspired me to make a celebration card with a frog and raining gold. I used a rub-on -- which is quite new to me, as I've never used one before (I guess they were popular before my time). It was a strange experience. A little frustrating, actually, and I can see why they're not making a whole lot of a comeback.
Nonetheless, I used a different supply that I didn't have to go out and buy and that made me happy. As happy as the little frog king sitting under a rain of gold.
Thanks for reading
~Elle~
Sunday, July 17, 2016
Chatty Sunday: SCS
It's Sunday and it's time for another chatty post! This week, I want to share a big piece of exciting news, and also chat a little about being busy.
So, for my big news... I'm a part of the Dirty Dozen Design Team over on Splitcoast Stampers!!!
I had to keep it a secret, but now I can talk about it since it's been announced! I'm still not fully believing it, but it's sure true...
I got the invitation from Lydia a little while ago and my first thought was that she surely meant to ask someone else! While I've lurked at SCS for a while, I'd only become active very recently and I was absolutely sure that I was flying under the radar. But lo and behold, she did mean to ask me and I accepted! I'm really thrilled, amazed and honored -- all rolled into one ball of butterfly-inducing excitement. I hope I can do it justice and help inspire all the friendly folks at SCS...
And that leads me to the next topic - being busy!
I'm still a part of the Some Odd Girl design team, and with 2 DT responsibilities, I might find myself mega busy... Couple that with trying for extra work, and you've got one potentially overwhelmed me. So, I may switch to a slightly different format when posting.
Normally, I write my posts and publish them right away. Then I can also share them on FB or Flickr. But I'm going to switch to pre-writing my posts so that you can see cards on a regular basis and I'm not writing them at midnight while I'm dead tired and unable to utter a single coherent sentence.
And there you have it! A quick chat on a sunny Sunday. I'll leave you with a quick card share:
So, for my big news... I'm a part of the Dirty Dozen Design Team over on Splitcoast Stampers!!!
I had to keep it a secret, but now I can talk about it since it's been announced! I'm still not fully believing it, but it's sure true...
I got the invitation from Lydia a little while ago and my first thought was that she surely meant to ask someone else! While I've lurked at SCS for a while, I'd only become active very recently and I was absolutely sure that I was flying under the radar. But lo and behold, she did mean to ask me and I accepted! I'm really thrilled, amazed and honored -- all rolled into one ball of butterfly-inducing excitement. I hope I can do it justice and help inspire all the friendly folks at SCS...
And that leads me to the next topic - being busy!
I'm still a part of the Some Odd Girl design team, and with 2 DT responsibilities, I might find myself mega busy... Couple that with trying for extra work, and you've got one potentially overwhelmed me. So, I may switch to a slightly different format when posting.
Normally, I write my posts and publish them right away. Then I can also share them on FB or Flickr. But I'm going to switch to pre-writing my posts so that you can see cards on a regular basis and I'm not writing them at midnight while I'm dead tired and unable to utter a single coherent sentence.
And there you have it! A quick chat on a sunny Sunday. I'll leave you with a quick card share:
(featuring Sweet Stamp Shop's Dragon stamp)
Thanks for reading!
~Elle~
Wednesday, June 8, 2016
Stripes & Unicorn
Another busy day, so here's a quick card share featuring Sweet Stamp Shop's Unicorn stamp. This time, I went with a more neutral palette and added pops of color with embellishments.
Thanks for reading!
~Elle~
Thanks for reading!
~Elle~
Friday, June 3, 2016
Unicorn Castle
Today feels like a cute unicorn kind of day, so I'm sharing a unicorn card. I've used two stamp sets from Sweet Stamp Shop -- Royal Wish and Unicorn. Both of them are smaller and more affordable sets, and they work perfectly together.
I wanted to have a cute starry background, so I cut a star sheet from Avery Elle's Everyday Collection 6x6 paper pad (if you don't have this paper pad, I really recommend getting it!). I matted it with a piece of light blue cardstock and adhered to a top-folding A2 base (4¼x5½").
For this card, I wanted to make a little scene, so I took out Lawn Fawn's Puffy Clouds Border die and die cut some white cardstock an dotty vellum cardstock. I arranged the layers together and adhered them to the bottom of my prepped card base.
I colored the castle and the unicorn with Copics, then fussy-cut them out with scissors. I adhered them to the card, using foam squares. I did the same with the sentiment.
As a last touch, I added 3 small enamel dots to tie in the bright colors.
Thanks for reading!
~Elle~
I wanted to have a cute starry background, so I cut a star sheet from Avery Elle's Everyday Collection 6x6 paper pad (if you don't have this paper pad, I really recommend getting it!). I matted it with a piece of light blue cardstock and adhered to a top-folding A2 base (4¼x5½").
For this card, I wanted to make a little scene, so I took out Lawn Fawn's Puffy Clouds Border die and die cut some white cardstock an dotty vellum cardstock. I arranged the layers together and adhered them to the bottom of my prepped card base.
I colored the castle and the unicorn with Copics, then fussy-cut them out with scissors. I adhered them to the card, using foam squares. I did the same with the sentiment.
As a last touch, I added 3 small enamel dots to tie in the bright colors.
Thanks for reading!
~Elle~
Labels:
Avery Elle,
cute,
scene,
stars,
Sweet Stamp Shop,
Unicorn
Tuesday, February 23, 2016
Paper Orphans (project)
I love patterned paper. I have towers of 6x6 paper pads and probably more paper than I can use... But paper is what inspires me the most. Some people are inspired by cute stamps, ink or new techniques. It's all paper for me. I can look through a few of my favorite patterned sheets and I immediately feel like making something.
I make mainly A2-sized cards (4¼x5½") which means I cut my 6x6 paper down to 4". This leaves me with a 2x6" strip of paper that I have affectionately named a paper orphan (you know, separated from their family and all). I save all those strips in a large zippy mesh bag because I just can't bear to get rid of them. Of course, this means my collection of orphans is growing exponentially, and it's time to figure out what to do with it all.
One of the options is to just use it for die-cutting. I could cut some cute shapes, words and panels. 2x6" is not a very large canvas to work with, but it's perfect for tiny hearts, stars and circles - which there's never enough of in my stash. However, all of my tiny shape dies are for my BigShot, and cranking out set after set gets tiring (not to mention takes way too long because my orphan stash is massive...).
So, I decided to just work with the orphans and try to use them in a more conventional way - as accent paper for various card layouts. This seemed to work really well, especially since I tend to favor the clean&simple (CAS) style of card-making. This gave me a chance to test out a few layouts and figure out new ways to use paper.
I came up with several different possibilities, but the one I liked best is to use the patterned paper as a border and add a white cardstock panel on top. I could vary the border shape to create some interest, as well as choose which side it went on. With this in mind, I created several layouts and then tested making some cards...
This first card was literally a "you have just one minute to make a card before someone walks in!" kind of card. I wanted to see if there was a super quick way to pull off a card using pre-made elements such as stickers, die-cuts or even stamped images I'd colored in advance. It worked great! The card was super simple to put together and having that pre-done base made it easy to choose all the coordinating elements.
With the second card, I took it a small step further and did a quick stamped and colored image. This made the card take just a tad longer, but it was still a pretty quick process - especially when it came to choosing colors. This is a great option for using up all the adorable little critter images. The layout gives them a way to shine without needing to set up a scene or get creative with die-cutting lots of extra panels.
For the last card, I went all out with stamping Julie, Copic-coloring and fussy-cutting it out. It made the card a bit more elaborate, but it still has the same unified simple style. With a sentiment and embellishments, it made the card feel like it's my style - i.e. not at all like it was pre-planned and made in pieces.
I'm going to continue working on this project, finding new layouts and combinations that work together. I think that having a stash of ready-to-go bases will be helpful with those quick need-em-now cards, and I just love the idea of making full use of the materials I own.
Thanks for reading!
~Elle~
I make mainly A2-sized cards (4¼x5½") which means I cut my 6x6 paper down to 4". This leaves me with a 2x6" strip of paper that I have affectionately named a paper orphan (you know, separated from their family and all). I save all those strips in a large zippy mesh bag because I just can't bear to get rid of them. Of course, this means my collection of orphans is growing exponentially, and it's time to figure out what to do with it all.
One of the options is to just use it for die-cutting. I could cut some cute shapes, words and panels. 2x6" is not a very large canvas to work with, but it's perfect for tiny hearts, stars and circles - which there's never enough of in my stash. However, all of my tiny shape dies are for my BigShot, and cranking out set after set gets tiring (not to mention takes way too long because my orphan stash is massive...).
So, I decided to just work with the orphans and try to use them in a more conventional way - as accent paper for various card layouts. This seemed to work really well, especially since I tend to favor the clean&simple (CAS) style of card-making. This gave me a chance to test out a few layouts and figure out new ways to use paper.
I came up with several different possibilities, but the one I liked best is to use the patterned paper as a border and add a white cardstock panel on top. I could vary the border shape to create some interest, as well as choose which side it went on. With this in mind, I created several layouts and then tested making some cards...
This first card was literally a "you have just one minute to make a card before someone walks in!" kind of card. I wanted to see if there was a super quick way to pull off a card using pre-made elements such as stickers, die-cuts or even stamped images I'd colored in advance. It worked great! The card was super simple to put together and having that pre-done base made it easy to choose all the coordinating elements.
With the second card, I took it a small step further and did a quick stamped and colored image. This made the card take just a tad longer, but it was still a pretty quick process - especially when it came to choosing colors. This is a great option for using up all the adorable little critter images. The layout gives them a way to shine without needing to set up a scene or get creative with die-cutting lots of extra panels.
For the last card, I went all out with stamping Julie, Copic-coloring and fussy-cutting it out. It made the card a bit more elaborate, but it still has the same unified simple style. With a sentiment and embellishments, it made the card feel like it's my style - i.e. not at all like it was pre-planned and made in pieces.
I'm going to continue working on this project, finding new layouts and combinations that work together. I think that having a stash of ready-to-go bases will be helpful with those quick need-em-now cards, and I just love the idea of making full use of the materials I own.
Thanks for reading!
~Elle~
Wednesday, June 3, 2015
Budget Wednesday - Taco' Bout
It's Wednesday, and it's time to talk about some penny-saving!
Today's card is a super simple card, featuring a cute set from the Sweet Stamp Shop called Give Em Tacos. This adorable mini set is only $3.95 and it includes both the taco and the sentiment. I colored my taco in with Copics, carefully cut around it and adhered it to a white notecard I found in my crafty closet. Then I stamped the sentiment and added 3 little enamel dots. Easy peasy! And looking good.
If you're not familiar with the Sweet Stamp Shop, it's a small shop that has both very affordable and completely adorable stamps. They have what we consider "regular" stamp sets (4x6") for $14.95, half-sets (2x6") for $7.95 and minis (3x3") for $3.95. This makes it easier to stay within a budget, but still pick up something super adorable. They also feature planner stamps, so if you're into planners or need a bunch of teeny images, definitely check them out.
There is one downside to their shop.... The stamps are only available for limited time. The designs do get retired, which means you might sometimes need to rush and get them asap. But they do feature retiring sales, too, which is an extra chance to save up.
Another thing that really helps save is to practice clean and simple cards with minimal design. This kind of design is all about using a very few carefully-placed elements to create something dramatic or eye-catching. I'm planning to write a post that goes more in-depth about clean and simple designs, so keep an eye out for that.
Thanks for reading!
~Elle~
Tuesday, May 12, 2015
Think Pretty Thoughts
Today's card features a super cute stamp set from Sweet Stamp Shop called Unicorn.
I started by stamping the unicorn, cloud and sentiment with brown ink onto some Copic marker paper. I then used Tag Builder 3 die from My Favorite Things to cut out a cute scalloped panel out of the stamped image. I colored it in with Copics, going with purples, pinks and a touch of blue. I also sketched in some hearts with a pink pen.
I cut a rectangular panel out of a piece of pink patterned paper I found in my scraps stash. I adhered it to a purple note-card, then drew a little scallop around it with a white gel pen. I adhered the center panel at an angle with foam tape.
Lastly, I added in some sequins all over the image. I think they bring in just the right amount of sparkle and shine.
Thanks for reading!
~Elle~
Thursday, May 7, 2015
It's been Oolong
It's a very rainy day here today, and the sky is so overcast that it almost looks like night-time (it certainly does look like night-time inside!). I really adore this kind of weather. Rainy, cool and perfect to stay inside and get crafty. So, I will try to sneak in some creative time today in between work and family.
The card I'm sharing today features a super cute little stamp from the Sweet Stamp Shop called "Oolong". This set has a few things I really love - cute faces on inanimate objects, a punny sentiment and tea. So, I just had to make a card with it.
I stamped the image and sentiment onto some Copic marker paper, then colored them in with my Copics. I was aiming for really quick and minimal coloring -- just a punch of brightness. I trimmed the paper a bit, then matted with a striped paper scrap I had laying about. I used a scallop die to cut a piece of red striped paper and adhered everything together.
A ribbon and some cute enamel dots finished the card off perfectly.
Thanks for reading and happy paper-crafting!~
~Elle~
Friday, August 22, 2014
Ahoy! (blog hop)

And, here's my card:
I started by creating my card base from Kraft cardstock - a standard A2 card base which measures 4 1/4 by 5 1/2".
I decided on a nautical card, so I grabbed Sweet Stamp Shop's Ahoy! stamp set and stamped the boat in black ink onto some Copic marker paper. I colored it in with my Copics and carefully cut around it, leaving a small white border. I stamped the sentiment onto a piece of white cardstock in navy ink, and also cut it out.
Then came the time to have fun with dies! I created a base panel from white cardstock, using Mama Elephant Femme Frames dies. I also cut a plain white circle using my Sizzix Circles framelits. I then grabbed a couple of papers from Carta Bella's Ahoy There! paper pad. I cut the red paper with a die from My Favorite Things' Blueprints 13, and a wave paper circle from the Sizzix circles framelits.
I adhered the base panel and the red piece straight to the card base. I also adhered the white circle and the wave circle with dot adhesive, then added it to the card with foam tape. I used foam tape to adhere the boat and the sentiment.
The last touch was a few Pretty Pink Posh sequins - in cobalt and aquamarine.
Supplies:
Sweet Stamp Shop Ahoy! stamp
My Favorite Things Hybrid Ink in Black Licorice
Stampin' Up Night of Navy classic inkpad
Neenah Desert Storm Environmental Cardstock in 100#lbs
Neenah Solar White Cardstock in 80#lbs
Copic Mini Marker Pad in 70#lbs
Copics (C4, C6, C8, E23, E25, E27, E29, R08, R46, B00, 0)
Carta Bella Ahoy There! 6x6 patterned paper
My Favorite Things Blueprints 13 dies
Mama Elephant Femme Frames dies
Sizzix Framelits Circles
Tombow Dot Adhesive (pink)
3M Scotch Foam Tape
Ranger Studio Multi-Medium glue
Pretty Pink Posh Sequins, cupped, 6mm in Cobalt and Aquamarine
Tuesday, August 19, 2014
Geometric Trees
Last night, I came across the Addicted to CAS challenge blog, and saw that they have a really interesting challenge going on at the moment.
The moment I saw the code word, I just knew I had the perfect stamp for it. So, I decided to make a CAS card and enter the challenge!
I started by creating my base out of MFT's Sweet Tooth cardstock by cutting and scoring it in half for a standard A2 card. I then cut a panel of white cardstock to measure 4 by 5 1/4".
I used Sweet Stamp Shop's retired set Fall Gratitude to stamp out some fabulous geometric trees and corresponding trunks. I drew a line in pencil to make sure all the trunks were even, then erased it after the ink was dry.
For the sentiment, I used Simon Says Stamp's Giving Thanks stamp set. I also stamped a little orange bird for an extra punch of color.
Lastly, I adhered the panel to the card base with foam tape.
Supplies:
Sweet Stamp Shop Fall Gratitude (retired)
Simon Says Stamp Giving Thanks
Stampin' Up inkpads in Calypso Coral, Baked Brown Sugar, Pumpkin Pie and Chocolate Chip
My Favorite Things Heavyweight Cardstock in Sweet Tooth
Neenah Solar White 80#lbs cardstock
3M Scotch Double-sided Foam Tape
The moment I saw the code word, I just knew I had the perfect stamp for it. So, I decided to make a CAS card and enter the challenge!
I started by creating my base out of MFT's Sweet Tooth cardstock by cutting and scoring it in half for a standard A2 card. I then cut a panel of white cardstock to measure 4 by 5 1/4".
I used Sweet Stamp Shop's retired set Fall Gratitude to stamp out some fabulous geometric trees and corresponding trunks. I drew a line in pencil to make sure all the trunks were even, then erased it after the ink was dry.
For the sentiment, I used Simon Says Stamp's Giving Thanks stamp set. I also stamped a little orange bird for an extra punch of color.
Lastly, I adhered the panel to the card base with foam tape.
Supplies:
Sweet Stamp Shop Fall Gratitude (retired)
Simon Says Stamp Giving Thanks
Stampin' Up inkpads in Calypso Coral, Baked Brown Sugar, Pumpkin Pie and Chocolate Chip
My Favorite Things Heavyweight Cardstock in Sweet Tooth
Neenah Solar White 80#lbs cardstock
3M Scotch Double-sided Foam Tape
Thursday, August 7, 2014
Sweet Stamp Shop - Elegant Flower Cheers
Whenever I buy a new stamp, I try to challenge myself to think of a few ways to use it. Sometimes it's as simple as a color combo. Other times, I'll jot down an idea. When I saw Sweet Stamp Shop's Elegant Flowers stamp, I knew I wanted to do a window trio of flowers.
For this card, I decided to pull out some Stampin' Up inks and coordinating cardstock. I decided to go with Daffodil Delight (yellow), Crisp Cantaloupe (coral) and Pool Party (blue). I cut a 1 1/2" square of each cardstock color.
I then cut a slightly smaller squares from white cardstock. I stamped the solid stamp in each color, then used a darker ink to stamp the outline. I tried not to stamp them perfectly on top of each other, just to add a bit of interest.
I adhered the white squares onto the co-ordinating colored squares with foam squares. I then adhered them onto an A2 white card base. I used a t-square ruler to help me keep the squares straight.
As a last step, I stamped the "Cheers" sentiment from Elegant Sentiments in chocolate ink. I kept the rest of the card clear.
Supplies:
Sweet Stamp Shop Elegant Flowers stamp
Sweet Stamp Shop Elegant Sentiments stamp
Stampin' Up Classic Inkpad in Daffodil Delight, Pumpkin Pie, Crisp Cantaloupe, Strawberry Slush, Pool Party, Coastal Cabana and Chocolate Chip (sentiment)
Stampin' Up cardstock in Daffodil Delight, Crisp Cantaloupe and Pool Party
Neenah Solar White 100#lbs cardstock
Scrapbook Adhesives 3D Foam Squares
For this card, I decided to pull out some Stampin' Up inks and coordinating cardstock. I decided to go with Daffodil Delight (yellow), Crisp Cantaloupe (coral) and Pool Party (blue). I cut a 1 1/2" square of each cardstock color.
I then cut a slightly smaller squares from white cardstock. I stamped the solid stamp in each color, then used a darker ink to stamp the outline. I tried not to stamp them perfectly on top of each other, just to add a bit of interest.
I adhered the white squares onto the co-ordinating colored squares with foam squares. I then adhered them onto an A2 white card base. I used a t-square ruler to help me keep the squares straight.
As a last step, I stamped the "Cheers" sentiment from Elegant Sentiments in chocolate ink. I kept the rest of the card clear.
Supplies:
Sweet Stamp Shop Elegant Flowers stamp
Sweet Stamp Shop Elegant Sentiments stamp
Stampin' Up Classic Inkpad in Daffodil Delight, Pumpkin Pie, Crisp Cantaloupe, Strawberry Slush, Pool Party, Coastal Cabana and Chocolate Chip (sentiment)
Stampin' Up cardstock in Daffodil Delight, Crisp Cantaloupe and Pool Party
Neenah Solar White 100#lbs cardstock
Scrapbook Adhesives 3D Foam Squares
Saturday, June 14, 2014
Happy Fathers' Day!
Happy Father's Day to all of you dads!
This card features a great stamp set by Sweet Stamp Shop - Dad's Toolbox. I started by stamping the toolbox and the tools, then I colored them in with my Copics. I carefully cut them out, leaving a small white border.
For the front panel, I grabbed a piece of white woodgrain paper from Simon Says Stamp. I cut out the three windows using Simon Says Stamp's tri square craft die. I adhered the front panel to the card base using foam tape. I added the tools to the inside of each window with foam squares.
I stamped the sentiment onto a piece of black cardstock with versamark ink. I then embossed it in white. After trimming the cardstock to size, I cut the end into a fishtail banner. I adhered the sentiment panel to the cardstock with foam squares.
Supplies:
Stamp: Sweet Stamp Shop Dad's Toolbox
Die: Simon Says Stamp Tri Square Craft Die
Ink: MFT Hybrid Ink in Black Licorice, Tsunkineko Versamark Ink Pad
Hero Arts Embossing Powder in white
Copics: Toolbox (R08, R46, R89, C02, C04, C06), Tools (C02, C04, C06, B24, B18, Y06, Y35, G14, E23, E37, E50)
Cardstock: Bazzill Marshmallow (base), Simon Says Stamp White Woodgrain, Bazzill Licorice Twist (black)
Scrapbook Adhesives Foam Tape
Scrapbook Adhesives Foam Squares
This card features a great stamp set by Sweet Stamp Shop - Dad's Toolbox. I started by stamping the toolbox and the tools, then I colored them in with my Copics. I carefully cut them out, leaving a small white border.
For the front panel, I grabbed a piece of white woodgrain paper from Simon Says Stamp. I cut out the three windows using Simon Says Stamp's tri square craft die. I adhered the front panel to the card base using foam tape. I added the tools to the inside of each window with foam squares.
I stamped the sentiment onto a piece of black cardstock with versamark ink. I then embossed it in white. After trimming the cardstock to size, I cut the end into a fishtail banner. I adhered the sentiment panel to the cardstock with foam squares.
Supplies:
Stamp: Sweet Stamp Shop Dad's Toolbox
Die: Simon Says Stamp Tri Square Craft Die
Ink: MFT Hybrid Ink in Black Licorice, Tsunkineko Versamark Ink Pad
Hero Arts Embossing Powder in white
Copics: Toolbox (R08, R46, R89, C02, C04, C06), Tools (C02, C04, C06, B24, B18, Y06, Y35, G14, E23, E37, E50)
Cardstock: Bazzill Marshmallow (base), Simon Says Stamp White Woodgrain, Bazzill Licorice Twist (black)
Scrapbook Adhesives Foam Tape
Scrapbook Adhesives Foam Squares
Monday, June 9, 2014
Amazing Birthday
I love making birthday cards. They can be silly or serious, they can be cute or classic, but they always make for a card that brings a smile to the recipient's face.
For this card, I wanted to play with Sweet Stamp Shop's June release - Elephant Hearts, Juggling Act and Monkey Business. I happened to grab all 3 of these stamps as an early bundle at the beginning of June, and they were just begging to be used together.
I started by stamping the elephant, the bear and the monkey on some Copic coloring marker paper. I colored them in with my Copics and carefully cut them out. I also colored and cut out the balloons that come in the elephant set.
The rest of the card was really simple to assemble. I made a base from kraft card stock, and adhered a piece of patterned paper to it. I then cut a piece of white cardstock to 3 1/2 by 5 1/2 for the center panel. I matted the white panel with black cardstock to create some interesting contrast.
I didn't bother cutting the strings of the balloons, as they were very thin. Instead, I stamped the balloon stamp directly on the white panel and layered the Copic-colored tops with foam squares. I also used foam squares to adhere the elephant, bear and monkey - making sure they were positioned as if they were standing on each others' heads.
I stamped a simple "Amazing!" sentiment, and the card is done!
Supplies:
Stamps - Sweet Stamp Shop Elephant Hearts, Juggling Act and Monkey Business.
Cardstock - Neenah Desert Storm #100lbs, Bazzill Marshmallow, Bazzill Licorice Twist
Ink: MFT Hybrid Ink in black licorice
Copics: Elephant (W2, W4, W6, R81), Bear (B000, B00, BV11, R04, R59, R81), Monkey (E21, E23, E35, E37, E47, R81), Balloons (V12, V06, R81, R85, BG11, BG32)
Uniball Signo Broad White Gel Pen
Scrapbook Adhesives 3D white thin foam squares
For this card, I wanted to play with Sweet Stamp Shop's June release - Elephant Hearts, Juggling Act and Monkey Business. I happened to grab all 3 of these stamps as an early bundle at the beginning of June, and they were just begging to be used together.
I started by stamping the elephant, the bear and the monkey on some Copic coloring marker paper. I colored them in with my Copics and carefully cut them out. I also colored and cut out the balloons that come in the elephant set.
The rest of the card was really simple to assemble. I made a base from kraft card stock, and adhered a piece of patterned paper to it. I then cut a piece of white cardstock to 3 1/2 by 5 1/2 for the center panel. I matted the white panel with black cardstock to create some interesting contrast.
I didn't bother cutting the strings of the balloons, as they were very thin. Instead, I stamped the balloon stamp directly on the white panel and layered the Copic-colored tops with foam squares. I also used foam squares to adhere the elephant, bear and monkey - making sure they were positioned as if they were standing on each others' heads.
I stamped a simple "Amazing!" sentiment, and the card is done!
Supplies:
Stamps - Sweet Stamp Shop Elephant Hearts, Juggling Act and Monkey Business.
Cardstock - Neenah Desert Storm #100lbs, Bazzill Marshmallow, Bazzill Licorice Twist
Ink: MFT Hybrid Ink in black licorice
Copics: Elephant (W2, W4, W6, R81), Bear (B000, B00, BV11, R04, R59, R81), Monkey (E21, E23, E35, E37, E47, R81), Balloons (V12, V06, R81, R85, BG11, BG32)
Uniball Signo Broad White Gel Pen
Scrapbook Adhesives 3D white thin foam squares
Saturday, May 10, 2014
Make A Wish
I recently got some gorgeous sequins from Pretty Pink Posh, and I wanted to make a simple card that puts emphasis on sequins.
This is actually the second card I made with this general idea. The first was much more elaborate, using watercolors and a lot of stamping, and I ended up not liking it. I wanted the dandelions to be the focus of the card, and they just felt like an afterthought the first time around.
So, I started by cutting a piece of patterned paper with a subtle texture (it's actually written "a wonderful day" again and again in soft blue). I matted it to a piece of black cardstock for contrast and adhered it to my base.
I drew the dandelion stalks with pen and glued Winter Snow Mix sequins to the end using my Ranger Studio multi-medium. This glue is great because it dries clear and it's not at all shiny like glossy accents. If you're like me, occasionally you'll end up having to slide the sequin around a bit. With glossy accents, you get a shiny spot on the card that is a pain to photograph. So, a strong glue that dries clear and matte is fantastic.
I stamped the sentiment using the Monogram Alpha stamp set from the Sweet Stamp Shop. I love the quirkiness of the letters in this stamp set and it perfectly matches the hand-drawn lines in the dandelions.
Lastly, I made a small bookmark tag for the top of the sentiment and added a wood veneer heart.
Supplies:
Sequins: Pretty Pink Posh Winter Snow Mix
Stamp: Sweet Stamp Shop Monogram Alpha
Ink: Memento Luxe in Nautical Blue
Ranger Studio Multi-Medium Matte
Base: Simon Says Stamp 100#lb in Fog
Paper: Bazzill Black Licorice, Webster's Pages Party Time! 6x6, Bazzill Rock Candy (bookmark tag)
Studio Calico Hearts & Arrows wood veneer
This is actually the second card I made with this general idea. The first was much more elaborate, using watercolors and a lot of stamping, and I ended up not liking it. I wanted the dandelions to be the focus of the card, and they just felt like an afterthought the first time around.
So, I started by cutting a piece of patterned paper with a subtle texture (it's actually written "a wonderful day" again and again in soft blue). I matted it to a piece of black cardstock for contrast and adhered it to my base.
I drew the dandelion stalks with pen and glued Winter Snow Mix sequins to the end using my Ranger Studio multi-medium. This glue is great because it dries clear and it's not at all shiny like glossy accents. If you're like me, occasionally you'll end up having to slide the sequin around a bit. With glossy accents, you get a shiny spot on the card that is a pain to photograph. So, a strong glue that dries clear and matte is fantastic.
I stamped the sentiment using the Monogram Alpha stamp set from the Sweet Stamp Shop. I love the quirkiness of the letters in this stamp set and it perfectly matches the hand-drawn lines in the dandelions.
Lastly, I made a small bookmark tag for the top of the sentiment and added a wood veneer heart.
Supplies:
Sequins: Pretty Pink Posh Winter Snow Mix
Stamp: Sweet Stamp Shop Monogram Alpha
Ink: Memento Luxe in Nautical Blue
Ranger Studio Multi-Medium Matte
Base: Simon Says Stamp 100#lb in Fog
Paper: Bazzill Black Licorice, Webster's Pages Party Time! 6x6, Bazzill Rock Candy (bookmark tag)
Studio Calico Hearts & Arrows wood veneer
Wednesday, April 30, 2014
Hello Gorgeous
This card started with a bunch of completely adorable stamps from the Sweet Stamp Shop. Not only does the Sweet Stamp Shop have the cutest stamps, but the owner (Nicole) is an absolutely amazing and kind person. I very much encourage everyone to check out her store. The stamps are high-quality polymer, and in limited quantities -- meaning, grab them as soon as you see them.
For this card, I started with 2 of the newer sets: Hedgehog Kiss and Stuck On This. I knew straight away that I wanted to create a scene where the lovestruck hedgehog meets an adorable girly cactus. I stamped the hedgehog and the cactus and colored them in with my Copics (and, of course, added highlights with a white gel pen). The scene looked a bit bare, however, so I also stamped out a couple of accessories (hat, flower, hearts). Lastly, I grabbed a speech bubble to add to the scene.
I created a quick shadow background on the card front, so that the figures didn't look like they were floating. I adhered the hedgehog, cactus and speech bubble.
For the sentiment, I wanted to go with something a bit more custom, so I used Monogram Alpha to spell out the word "Gorgeous". I stamped a tiny hello in front of it.
The last touch was adding a small peach flower by the sentiment and a few sequins and pearls to the top of the card.
Supplies:
Ink: My Favorite Things Hybrid Ink in Black Licorice, My Favorite Things Hybrid Ink in Hot Fudge (sentiment)
Stamps: Sweet Stamp Shop - Hedgehog Kiss, Stuck on This, Foxy, Monogram It, Monogram Alpha
Cardstock: Bazzill Marshmallow
Copics: Hedgehog (E42, E15, W4, W6, W8, 100 Black, R43, B91, B95, B99), Cactus (YG00, YG06, YG67, R08, R46, R59, R89, R43, B00), backgound (W2, W4)
Prima Flowers Fresh Cut Bloom
Hazel & Ruby Think Pink sequins
Kaiser Scrapbook Pearls
Kaiser Scrapbook Adhesive Gems
For this card, I started with 2 of the newer sets: Hedgehog Kiss and Stuck On This. I knew straight away that I wanted to create a scene where the lovestruck hedgehog meets an adorable girly cactus. I stamped the hedgehog and the cactus and colored them in with my Copics (and, of course, added highlights with a white gel pen). The scene looked a bit bare, however, so I also stamped out a couple of accessories (hat, flower, hearts). Lastly, I grabbed a speech bubble to add to the scene.
I created a quick shadow background on the card front, so that the figures didn't look like they were floating. I adhered the hedgehog, cactus and speech bubble.
For the sentiment, I wanted to go with something a bit more custom, so I used Monogram Alpha to spell out the word "Gorgeous". I stamped a tiny hello in front of it.
The last touch was adding a small peach flower by the sentiment and a few sequins and pearls to the top of the card.
Supplies:
Ink: My Favorite Things Hybrid Ink in Black Licorice, My Favorite Things Hybrid Ink in Hot Fudge (sentiment)
Stamps: Sweet Stamp Shop - Hedgehog Kiss, Stuck on This, Foxy, Monogram It, Monogram Alpha
Cardstock: Bazzill Marshmallow
Copics: Hedgehog (E42, E15, W4, W6, W8, 100 Black, R43, B91, B95, B99), Cactus (YG00, YG06, YG67, R08, R46, R59, R89, R43, B00), backgound (W2, W4)
Prima Flowers Fresh Cut Bloom
Hazel & Ruby Think Pink sequins
Kaiser Scrapbook Pearls
Kaiser Scrapbook Adhesive Gems
Subscribe to:
Posts (Atom)