Showing posts with label Stamp Trio Challenge. Show all posts

Friday, October 26, 2018

Stamp Trio Challenge: Lotus Birthday

Waffle Flower - Lotus stamp

For the final card in my Stamp Trio challenge, I decided to make something a bit clean-and-simple. I combined the elements from the first two cards, using a grab and aqua palette, along with some dotted vellum to tie the background to the images.

I really enjoyed this challenge and by limiting my coloring to an unusual palette, I ended up with 3 very lovely creations. I may push myself to do something like this with all of my floral stamps (and I've got a bunch of them...).

Thank you for taking a look.
~Elle~

Thursday, October 25, 2018

Stamp Trio Challenge: Lotus Thoughts

Waffle Flower - Lotus stamp

For the second card in the challenge, I decided to use some patterned paper I've had in my stash for ages. I liked the small splatters in the pattern - they reminded me of a night sky. But the soft desaturated blue palette worked very well for the soft coloring I had on the lotus.

I embossed a sentiment in vanilla embossing powder. As it's softer than white and a warmer tone, I think  it worked much better than plain white (which would have had too much contrast).

Thanks for reading!
~Elle~

Wednesday, October 24, 2018

Stamp Trio Challenge: Lotus Thanks

Waffle Flower - Lotus stamp

I've been enjoying my trio series so much that I decided to give it another try- this time, using one stamp on 3 different cards. The stamp I chose to use has been in my stash since 2015. I absolutely fell in love with the design, but - as it goes with flower stamps - I felt kind of intimidated to use it.

As I've been working to step outside my comfort zone, I jumped straight in and stamped several of the lotus images to color with my Copics. I chose softer, less saturated palettes and took some time to add extra depth and shading.

For the first card, I blended a water background using some blue dye ink. I thought it contrasted great with the soft flowers, but still gave me a chance to stamp a greeting in soft gray. I kept the embellishments to a minimum, adding just a few clear droplets. I think it turned out wonderful.

Thanks for reading.
~Elle~


Thursday, August 4, 2016

STC- Birdie Brown: Birthday Bears

It's time for another Stamp Trio Challenge! This is a personal challenge where I take one stamp and use it to create 3 different cards. This week, I'm using Birdie Brown's Birthday Bears stamp set. If you've taken a glance at my blog, you know I'm a big fan of Torico's illustrations and lovely design style. So, I'm always inspired and excited to use one of her stamps.

Birthday Bears features great images that can be used for birthdays, celebrations and more. There are 2 bear sizes and a variety of accessories. I was also really excited about the sentiments, as it features both punny and classic birthday greetings. Since birthday and thank-you cards are the cards I make most often, it's always nice to have a good variety of sentiments to use.


The first card I created used a lovely striped paper from My Favorite Things called Thick & Thin. I've been really drawn to purple lately, especially when combined with yellow - so those are the colors I chose for the card. I created a front panel using a scalloped rectangle, and I used a stencil and Wild Honey distress ink to create a starry background. I embossed the sentiment onto a black strip of cardstock -- I love how this turned out, making it look like a word sticker.

For my second card, I used the County Fair Plaid paper from MFT. I went with an orange/gold theme for this card, and used some sequins and enamel dots to embellish the space. I also used a curved scallop die to create a fun and interesting shape for the front panel.

For my last card, I found a fun dotty paper in my paper stash and used it as inspiration for the rest of the card. I paired it with a curved white panel at the bottom and a die-cut circle matted with a scalloped pink edge. A few enamel dots and a sentiment finish it off perfectly.

Though I'm happy with all 3 cards, I will continue working with this stamp set to create a few more - in particular, a few masculine cards, as I'm running low on those.

Thanks for reading!
~Elle~

Thursday, June 23, 2016

Stamp Trio: ME - Up and Away

It's time for another Stamp Trio Challenge!

Last time, I used Mama Elephant's Carried Away (see post here) to create 3 cards, and I also pulled out Mama Elephant's Up And Away to use for extra variety. Since I happened to stamp out some extra critters from Up and Away, I decided to go for a card trio with that set as well.

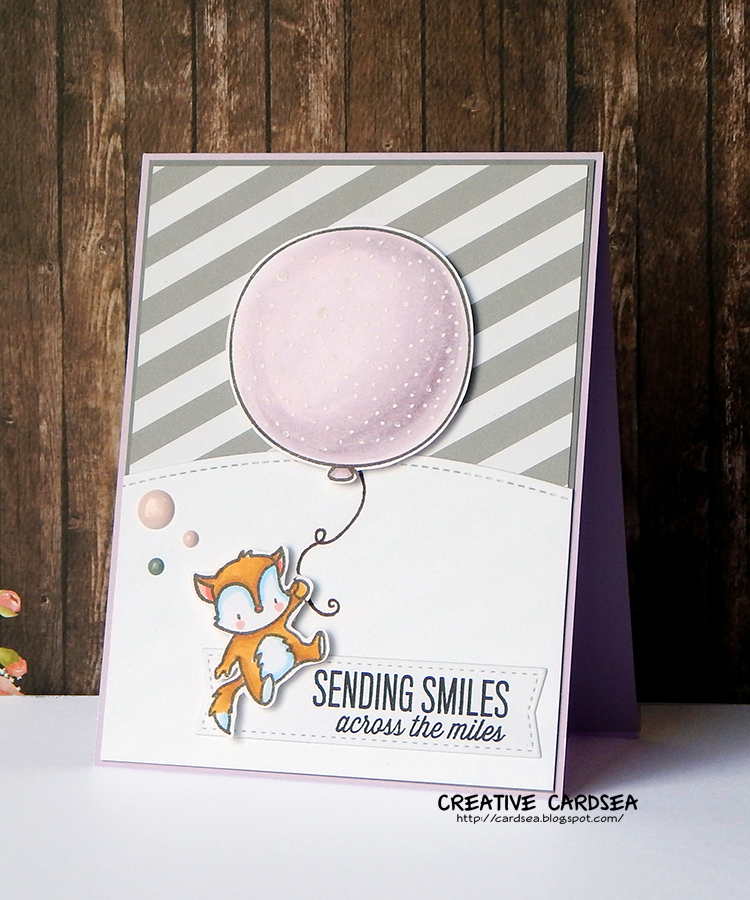
I started with a simple card using the first critter, which I turned into a fox, and the balloons. I colored the images with Copics and added some dots to the balloons as an extra texture. I think it makes them look like celebration balloons. For the rest of the card, I used peachy colors with a touch of black for contrast and a couple of teal enamel dots to tie in with the balloons.

For the second card, I used the critter again, but colored him a tawny brown color. I added the big balloon from Carried Away. I used a similar color scheme, replacing the bright aqua with a warm orange yellow. Like with the first card, I added some texture to the balloon by adding white dots with a gel pen. For embellishment, I added a few sequins in addition to the enamel dots.

Finally, the third card was a bit more complicated. I used the same warm orange/yellow as the previous card, but I replaced the critter with the bunny and the balloon with an umbrella. I also added a tiny bear from Carried Away. For the background, I die-cut a tag from watercolor paper and covered it with some minty watercolor. This created a nice and subtle texture. I added just sequins as embellishment.

For this particular card trio, I tried to build cards with unifying elements. So, there's a flow to the cards in terms of palettes, embellishments and the layout. Each card had something similar to the card before it, as well as an introduction of a new element. This left me with a small card set that goes well together, but isn't just one repeated design.

Bonus card- I had a few pieces left over, so I decided to try a completely different palette. It's much softer and more subtle than the rest, so it doesn't fit in as a set. But it does make a lovely stand-alone card.

Thanks for reading!
~Elle~


Friday, June 10, 2016

Card Trio: Carried Away

I'd like to share another card trio project with you today, this time using Mama Elephant's Carried Away stamp set. I have owned Mama Elephant's Up and Away stamp set for a while and really enjoyed using it, so when Carried Away was introduced as a companion set, I jumped at the chance and bought it straight away.

The first card I made uses one of the cute boys and his little bunny, along with an encouraging sentiment. I used the umbrella from Up and Away, and set the scene against a paper with fun patterned clouds. I embellished with some enamel dots and sequins.

For the second card, I kept the floating theme and added another boy from Carried Away with the balloons from Up and Away. I kept this card simpler by using a solid piece of paper and embellished with enamel dots and sequins.

For the last card, I went with a more grounded approach and gave the girl a happy mail letter instead. I used a lovely purple wood paper and just a couple of small enamel dots as embellishment.

Thanks for reading!
~Elle~

Saturday, June 4, 2016

Bunny Tea Time x 3

One of the things I've been trying to challenge myself to do a lot more of lately is multiple cards with the same stamp set. Not only is this making good use of the set, but it helps me build up my card stash better - and leaves me with lots of cute cards I can gift to friends and family.

So, I'm bringing back my Stamp Trio Challenge and sharing 3 cards made with one stamp set.

Today's stamp set is Bunny Tea Time by Memory Box (you can find it here).

This is a smaller stamp set (which makes it very affordable), but it still has a great variety of images and sentiments to work with. I chose to stamp out my images in black hybrid ink, then color them in with Copics. I stamped and colored a lot more images than what I used for my three cards, which leaves me with cute images I can use in the future, as well.

For the first card, I used a lovely patterned paper from Shimelle's True Stories paper pad. I loved the brightly-colored cups, so I used them as inspiration for coloring the bunny. This card is a bit busier than usual, but I still like the bright colors.

For the second card, I went with a style that's a bit more subdued. I used My Favorite Things' Painted Prints: Citrus paper pad that had lovely painted blue stripes. To create some extra contrast, I added some orange/yellow and gold. For this card, I played with off-center placement, and I really like how it turned out. I also dug into my embellishment box and pulled out several different enamel dots and sequins.

The last card is probably my favorite. I used another paper from Painted Prints: Citrus, and I added a Project Life journaling card I'd matted with some cardstock. I set the card on an angle, then added a chipboard frame and the bunny + sentiment. I liked how the elements echoed off of each other (polka dot background/polka dot frame) even though nothing matched up perfectly or came from a single paper line.


I hope you enjoyed seeing Bunny Tea Time in use and that you're inspired to dig out a stamp set yourself and get creative!
~Elle~

Thursday, September 11, 2014

Picture Thanks

This is the third and final card in my Stamp and Paper Trio challenge. Stamp Trio challenge is where I take one single stamp set and use it to make 3 very different cards. To see the previous cards, click here for card 1 and here for card 2.

As the previous two cards, this card uses WPlus9's Fanciful Feathers stamp set as well as My Mind's Eye Mint Julep 6x6 patterned paper.

I started by cutting a panel of mint polka dot patterned paper with a rectangle in MFT's Blueprints 1 die. I also die-cut the same rectangle out of white cardstock. I positioned the smaller rectangle inside the cardstock and ran it through my BigShot again. This left me with a thin white frame.

I created a standard top-folding A2 (4 1/4 by 5 1/2") card base from white cardstock. I adhered the patterned paper to the card front with my standard adhesive, making sure it's straight. I then adhered the frame using foam tape.

I stamped the Thank You sentiment underneath in coral ink, then added a piece of thin silver washi tape underneath.

I stamped the feather from Fanciful Feathers twice, using a coral/dark pink and green/dark green. I carefully cut around them with my scissors, leaving a small white border. I adhered the two feathers to each other, then added them to the card with foam tape.

And voila!

I hope you enjoyed the three elegant cards in this challenge. If it inspires you to try your own Stamp Trio or Paper Trio challenge, let me know! I'd love to check it out. :)

Supplies:
WPlus9 Fanciful Feathers stamp

MFT Blueprints 1 dies
Stampin' Up Classic Inkpad in Crisp Cantaloupe, Strawberry Slush, Pear Pizzazz and Old Olive
Neenah Solar White 110#lbs cardstock
Tombow Dot Adhesive (pink)
3M Double-Sided Foam Tape
Thin silver Washi tape

Monday, September 8, 2014

Elegant Grateful

This is the second entry in my Stamp Trio Challenge (first card is here). Stamp trio challenge is to use one single stamp set to make 3 different cards. As an added bonus, my friend Kylie and I are also hitting Paper Trio challenge this time -- where we have to use a single paper pack for the 3 cards, as well.

Like last time, my stamp set of choice is WPlus9's Fanciful Feathers stamp set and my paper of choice is My Mind's Eye Mint Julep 6x6.

With the first card, I used the patterned paper as the dominant element on the card, and the elegant sentiment and feathers were a decoration. I covered the entire card front with a piece of patterned paper and its thick, bold stripes created a very graphic look.

For the second card, I wanted to keep the same elegance, but make my use of patterned paper different - this time as an accent piece instead of the main element. This is a great way to incorporate patterned paper into clean-and-simple cards and stretch out your stamps a bit. You can give the same sentiment a different feel simply by switching out the patterned paper.

As with the first card, I created a top-folding A2 card base (4 1/4 by 5 1/2"). While I had my trimmer out, I also cut a piece of gray cardstock, a white panel and a strip of the beautiful flowered pattern paper.

I kept this card super simple. After adhering the patterned paper to the gray cardstock, I trimmed the white panel down into 2 pieces to create a peek window. I adhered it to the gray base with foam tape, then wrapped some slate ribbon just above the patterned window.

I stamped the sentiment onto the leftover piece of white cardstock and cut it down to size, leaving one end angled. I added it on top of the ribbon, using foam tape. Lastly, I adhered the entire panel to the card base with my standard adhesive.

Supplies:
WPlus9 Fanciful Feathers stamp
MFT Hybrid Ink in Steel Blue
MFT Heavyweight Cardstock in Steel Blue
Neenah Solar White 110#lbs cardstock
Tombow Dot Adhesive (pink)
3M Double-Sided Foam Tape
Slate satin ribbon

Sunday, September 7, 2014

Feather Thanks

As I've mentioned in my last post, I'm doing another Stamp Trio challenge, but this time with an added twist - a paper trio challenge as well! Stamp Trio challenge is where I take one stamp set and use it to make 3 different cards. Sometimes the differences are in technique, other times in theme. As an extra challenge, I'll be using just one paper pad, too.

This time, my stamp set of choice is WPlus9's Fanciful Feathers stamp set. I originally bought this stamp set quite a while ago because I liked the feathers. But I have not had a chance to take it out and play with it until now. Besides the feathers, the stamp set also includes a couple of very elegant sentiments - which inspired me to keep all 3 of the challenge cards simple and elegant.

My paper of choice is My Mind's Eye Mint Julep 6x6. I chose this set because it had a large variety of papers - some with flowers or hearts that are feminine, others with bold prints that could be used for masculine or gender-neutral cards.

I started the card by picking out a bold black and white striped paper. I trimmed it to 4 by 5 1/4". While I had my trimmer out, I also cut and scored my top-folding A2 card base out of white cardstock. I adhered the striped paper straight to the card front with my standard adhesive.

 Since Fanciful Feathers is a builder set, it includes 2 versions of the stamp. One is the base color, and the other is the outline. I stamped the base layer twice - once in a light brown, and the other in light green. I then stamped the outline layer over it, using a darker brown and a darker green. This step was a bit tricky, and it took me a couple of tries to have the two stamps line up exactly how I wanted it. Next time, I'll use my stamp-a-ma-jig stamp positioner to help me with the stamp placement.

Although Fanciful Feathers has a matching die set, I chose to fussy-cut the two feathers with a pair of sharp scissors. I set them aside while I worked on the sentiment panel. I stamped the "Thank you" in dark brown ink, then stamped "Friend" underneath it in dark green onto a piece of white cardstock. I cut down the panel to size, and adhered it to the card with foam tape.

I layered the two feathers together and adhered them at the bottom of the panel. I used dot adhesive where the feathers touched the sentiment panel and foam tape where they touched the patterned paper.

As a last touch, I added 3 shimmery gold Doodlebug enamel dots.

Supplies:
WPlus9 Fanciful Feathers stamp set
Neenah Solar White cardstock in 110lbs
Stampin' Up Classic Inkpad in Baked Brown Sugar, Soft Suede, Pear Pizzaz and Old Olive
My Mind's Eye Jubilee Collection Mint Julep 6x6 patterned paper
Tombow Dot Adhesive Runner (pink)
3M Double-Sided Foam Tape
Doodlebug Gold Sprinkles enamel dots

Sunday, August 10, 2014

Stamp Trio: Hennah Ink

Apologies if the quality of the image is not ideal. My camera's been acting up...

This is the 3rd and final card in my Stamp Trio challenge, still using Altenew's Hennah Elements. I had originally planned to do some Copic coloring, but I decided to instead work with just stamping and different colors of ink. One thing that initially drew me to Hennah Elements was that there were many small elements that could be used to construct a more complex image. Having many decorative elements helps create one-layer cards that are still elaborate and unique.

I started by creating a standard A2 card base out of plain white cardstock. While I had my paper cutter out, I also cut a couple of panels out of the same white cardstock.

I started by inking the border stamp in chocolate chip ink. After stamping it twice, I switched to a couple of flourishes to embellish the border.

I switched to a blue ink and stamped the small flower 3 times.

Then, I switched to the coral ink and stamped a few leaves around the flowers.

Lastly, I stamped the sentiment in the same coral ink.

I matted the two panels together with foam squares, then adhered it to the card front.

Supplies:
Altenew Hennah Elements stamp
Simon Says Stamp Friendship Messages stamp 
Stampin' Up classic inkpad in Chocolate Chip, Pacific Point and Crisp Cantaloupe
Neenah Solar White cardstock in 80lbs and 110lbs
Stampin' Up dimensionals

Saturday, August 9, 2014

Stamp Trio: Hennah Paper

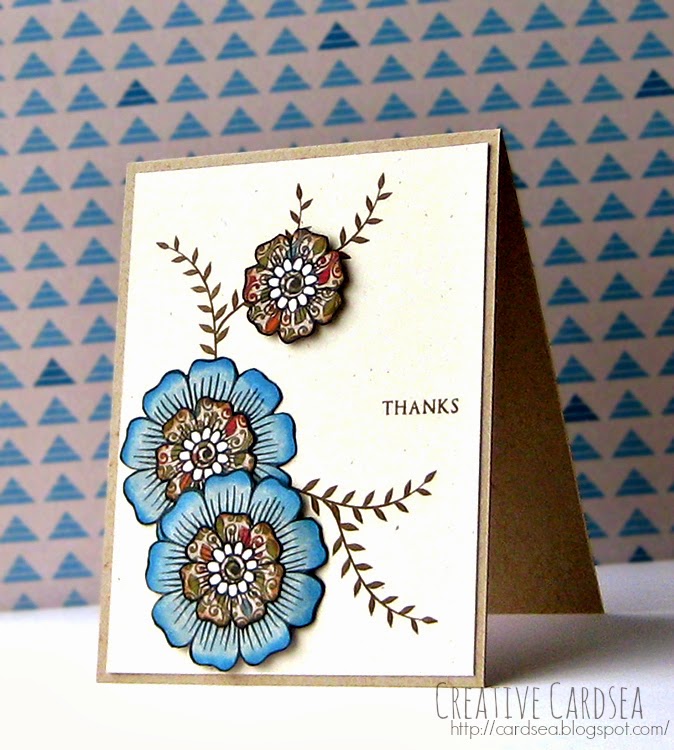
This is the second entry in my Stamp Trio challenge, using Altenew's Hennah Elements. For the second card, I decided to use paper piecing and go with a more vintage feel. The flowers in the stampset are perfect for the paper piecing technique, as they're both large and simple.

I started by stamping the two large flowers on some blue patterned paper. I stamped the 3 smaller flowers onto some more detailed cream patterned paper. After cutting them out with my scissors, I used my foam blending tool to ink the edges with a bit of distress ink (Salty Ocean for the blue flowers and Vintage Photo for the cream). After this, I filled in some ovals near the small flower centers with white gel pen to create a little more contrast. I adhered two of the cream flowers to the centers of the blue flowers.

I cut a piece of MFT's Primitive Cream cardstock to measure 4 by 5 1/4". While I had my paper cutter, I also cut a piece of Neenah Desert Storm cardstock in half to create a top-folding A2 card.

After deciding where to position the flowers, I stamped a few of the flower vines around the card front in Soft Suede brown ink. I also stamped the small thanks sentiment from the Hennah stamp set.

I adhered the cream panel to the card front, then adhered one of the blue flowers straight onto the panel with tape adhesive. I layered the second flower with foam squares, then added the last small flower to the top.

Supplies:
Altenew Hennah Elements
MFT Hybrid Ink in Black Licorice
Stampin' Up Classic inkpad in Soft Suede
K & Company Tim Koffey Journey 6x6
MFT Heavyweight cardstock in Primitive Cream
Neenah Desert Storm Environmental cardstock 100#lbs
Distress ink in Salty Ocean and Vintage Photo
Uniball Signo Broad white gel pen
Stampin' Up dimensionals foam adhesive
Tombow Dot adhesive runner (pink)

Friday, August 8, 2014

Stamp Trio: Hennah Water


 It's been a little while since I've done my Stamp Trio challenge, where I take one stamp set and use it to create 3 very different cards. This time, I decided to use Altenew's Hennah Elements stamp. Hennah Elements has flowers and swirls that are very clear and bold, as well as plenty of flourishes and small decorative elements.

Normally, stamp trio challenge has me creating 3 different card that could be masculine, feminine or neutral. With Hennah Elements, however, I want to focus more on coloring techniques. So, all 3 of the cards in this challenge will be thank you cards with graphics elements from the stamp set. But I will be using different coloring techniques for each card.

For the first card, I decided to use watercolor. I've been wanting to practice watercolor for a while now, as I feel like I've still got tons to learn.

I started by taping down a piece of Tim Holtz distress watercolor paper and stamping the 3 flowers and 2 large leaves in Ranger Archival Jet Black ink. I colored in the flowers using Festive Berries distress marker and water. Since I wanted to add a little depth, I used more watter on some petals and less on others.

While the flowers were drying, I used Mowed Lawn distress marker to color in the leaves. I zapped the flowers and the leaves with my heat gun until they were dry, then layered the shadows by scribbling directly on the paper wit the two distress markers. I used very little water to blend out the scribbles, then zapped it with my heat gun again.

I used Spiced Marmalade distress marker to color in the flower centers, adding just a touch of Ripe Persimmon distress ink in some spots for depth. After drying the paper once more, I got to work on the background. I used the Salty Ocean distress marker and a lot of water to create a background on the bottom and left side of the panel, then faded into white in the top/right side.

After the background was dry, I added the color splatters by loading the brush with watercolor and tapping it against my finger (it's messy, but it works!).

The last step was adding a sentiment from Simon Says Stamp's Thanks set. It was still looking a bit plain, so I stamped a decoration from Hennah Elements by the sentiment and two leaf vines between the watercolored flowers.

I cut down the panel so it was even on all sides and adhered it to a standard A2 card base with lots of foam squares.

Supplies:
Altenew Hennah Elements stamp
Simon Says Stamp Thanks stamp
Ranger Archival Ink in Jet Black
Tim Holtz Distress Watercolor cardstock
Distress markers in Festive Berries, Mowed Lawn, Spiced Marmalade, Ripe Persimmon and Salty Ocean
Bazzill Marshmallow cardstock (base)
Scrapbook Adhesives 3D foam squares

Saturday, July 12, 2014

ME- Protected

This is the third and final card in my Stamp Trio challenge, using Mama Elephant's In My Heart stamp. This time, I wanted to play with texture and dies. I had already stamped, colored and die-cut the boy and the girl while I was making the second card, so they were ready to use.

I started by preparing my card base. I cut a sheet of Simon Says Stamp Lemon cardstock in half, and scored it for a top-folding A2 card. Using the Cuttlebug Seeing Spots embossing folder, I added a large polka dot texture to the front.

While I had my Bigshot out, I cut out the rest of the panels I would be using. I used the stitched rectangle from Mama Elephant's Femme Frames die to cut a rectangle from Simon Says Stamp's Sea Glass cardstock. I cut a piece of white cardstock with Pretty Pink Posh's Stitched Duo I die, as well as the same shape out of Doodlebug vellum. Then, I used the stitched scallop border from Pretty Pink Posh's Stitched Borders I die to cut the vellum piece.

I layered the vellum to the bottom of the white cardstock and adhered it together with a bit of glue. I tied a piece of yellow twine from Pretty Pink Posh's Summer embellishment kit around the bottom of the panel. I attached the boy and the girl from Mama Elephant's In My Heart set to the panel with foam squares.

I then adhered the panels to the card. As a last touch, I added a few flower sequins from the summer embellishment kit near the sentiment.

Supplies:
Stamp: Mama Elephant In My Heart
Ink: MFT Hybrid Ink in Black licorice, Ranger Archival Ink in Jet Black (sentiment)
Dies: Mama Elephant Femme Frames, Pretty Pink Posh Stitched Duo I, Pretty Pink Posh Stitched Borders I
Cuttlebug A2 Embossing Folder Seeing Spots
Cardstock: Simon Says Stamp Heavy Cardstock in Lemon and Sea Glass, Neenah Solar White 110lbs
Doodlebug Sprinkles vellum in Coral
Copics
Pretty Pink Posh Summer Embellishment Kit

Thursday, July 10, 2014

ME- Thinking of You

This is the second card in my stamp trio challenge, using Mama Elephant's In My Heart stamp.

First, I quickly created a base for the card by cutting a sheet of Surf Blue cardstock in half. I scored it, making it into a standard A2 card.

I started by grabbing a sheet of Tim Holtz distress watercolor paper, which measures 4 1/4 by 5 1/2". Using distress inks and some water, I created a dreamy watercolor background. I had some warping from the water, so I decided to mat the background onto some cardstock.

I cut the panel down to measure 3 3/4 by 5", then adhered it to a piece of dark grey cardstock that measured 4 by 5 1/4". I adhered the entire panel to the base.

I placed the girl onto the background with some foam squares, and quickly sketched in a shadow underneath her.

For the sentiment panel, I started by sketching out a puffy cloud on a piece of white cardstock and cutting it out with my scissors. I stamped the sentiment in the middle, then adhered it to the card with foam squares. As a bit of a whimsical touch, I added some stitch lines just inside the border with a gel pen. I also drew in some round thought-bubble circles with a white gel pen directly on the watercolor panel.

Lastly, I adhered some Pretty Pink Posh gold and silver sequins to the top of the card. I think they kind of look like stars, and they sure shimmer and shine!

Supplies:
Stamp: Mama Elephant In My Heart
Ink: MFT Hybrid Ink in Black Licorice, Ranger Archival Ink in Jet Black and Vermillion, Ranger Distress Inkpads in Tea Dye, Broken China, Salty Ocean and Chipped Sapphire
Tim Holtz Distress Watercolor paper
Cardstock: Simon Says Stamp heavyweight cardstock in Surf Blue and Slate
Copics (E00, E11, E13, R20, R32, B00, Y11, Y35, E35, E37)
Pretty Pink Posh 4mm cupped sequins in Metallic Silver and Metallic Gold
Sakura Souffle gel pens (teal)
Uniball Signo broad white gel pen

Wednesday, July 9, 2014

Mama Elephant - Circus is Coming

It's time for another Stamp Trio Challenge! If you're new to my blog, you can read about the challenge a bit here.  This time, I will be working with the newly released Mama Elephant set In My Heart. This set was inspired by Operation Write Home, and it's filled with adorable images of little ones and sweet sentiments.


For this first card, I wanted to go with something bright and happy - and depart from my usual birthday/thankyou/hello set. I thought it might be fun to create a circus scene.

I started by stamping the boy and the girl from the In My Heart set and die-cut them with the matching dies, using my BigShot. I then colored them in with my Copics, and added mouths for a bit of extra expression. Since the images were small, it was pretty easy to color them in, using just a few colors. I also stamped a platform for the girl to stand on from Sweet Stamp Shop's Juggling Act, and colored it with Copics. I cut it out, leaving a fine white border to match the other die-cuts.

I prepared the card base, using Simon Says Stamp's Smoke cardstock, which I cut and scored in half to measure 4 1/4 by 5 1/2" (standard A2 size). I cut a piece of spotted patterned paper from My Mind's Eye Just Splendid paper pack to measure 3 3/4 by 5". I adhered it to the base, which left a lovely border around the outside of the card.

I drew a couple of wires at the top of the card with a black pen, and adhered the stamped elements with foam squares.

I stamped a simple sentiment on a piece of white cardstock and adhered it to the card with foam squares. As a last touch, I added a single enamel dot to the side of the sentiment panel.

Supplies:
Mama Elephant In My Heart stamp
Mama Elephant In My Heart coordinating dies
Sweet Stamp Shop Juggling Act
Sweet Stamp Shop Elephant Hearts
MFT Hybrid Ink in Black Licorice
Copics
Simon Says Stamp Smoke Heavy Cardstock
My Mind's Eye: Record It! Just Splendid 6x6
Teresa Collins  Enamel Dots Daily Stories
Scrapbook Adhesives Thin 3D foam squares
Sakura Pigma pen 0.3mm

Saturday, June 21, 2014

Avery Elle- Pink Thanks


This is the final card in my stamp trio challenge, using Avery Elle's Many Thanks stamp set.

With this card, I wanted to go in a more feminine direction, so I pulled out some pink ink and ribbon.

I started by creating a card base that measures 4 1/2 x 10", folding it in half to create a top-folding card that measures 4 1/2 by 5". This is slightly smaller than an A2 card.

For the center panel, I cut a piece of white cardstock to measure 4 by 4 1/2. I started by stamping the sentiment in black ink. I then pulled out Avery Elle's Brushed stamp set and stamped a small brushstroke stamp 3 times in the upper right corner. I used a pink color twice, and a brown in the middle to add just a touch of warmth.

I added a piece of pink ribbon to the bottom of the panel, then adhered the panel to a piece of patterned paper. I adhered the front to the card base.

Lastly, I added 3 small enamel dots by the sentiment to tie all the colors together.

Supplies:
Stamps: Avery Elle Many Thanks, Avery Elle Brushed
Ink: MFT Hybrid Ink in black licorice, Mama Elephant Pigment Ink in bubblegum and hazelnut
Neenah Desert Storm environmental cardstock in 100#lbs
Simple Stories Color Vibe 6x6
Pink ribbon
My Mind's Eye Reds enamel dots
My Mind's Eye Charmed enamel dots

Friday, June 20, 2014

Avery Elle - Simple Thank You


This is the second card in my stamp trio challenge, using Avery Elle's Many Thanks stamp set.

This card was very simple to create, and it uses only a few supplies. So it's perfect for beginners or for occasions when you just need a super quick card.

I started by creating a base from a piece of Avery Elle's Whipped Cream cardstock. I cut the cardstock in half to measure 5 1/2 by 8 1/2", and scored in the middle to create the standard A2 card (5 1/2 by 4 1/4").

For the paper, I wanted to continue with the sunset-like theme, so I chose a piece of paper from Authentique's Radiant 6x6 paper pad. I cut it to measure 3 3/4 by 5". I also cut a piece of Avery Elle's Fizz cardstock to measure 4 x 5 1/4". I adhered the patterned paper to fizz cardstock.

I cut a 3 1/2" by 5" strip of vellum. I stamped the sentiment in Versamark ink, and embossed it with Ranger's Platinum embossing powder. I adhered the strip to the front panel by wrapping it around the front and securing with a piece of tape.

I adhered the front panel to the card base. As a last touch, I added 3 shimmering gold sequins to the upper right of the card.

Supplies:
Stamp: Avery Elle Many Thanks
Ink: Tsukineko Versamark ink pad
Cardstock: Avery Elle Heavy cardstock in Whipped Cream and Fizz, Bazzill 40lbs Vellum
Authentique Radiant 6x6 paper pad
Ranger Embossing Powder in Platinum
Pretty Pink Posh 4mm sequins in Metallic Gold

Tuesday, June 17, 2014

Avery Elle - Sunset Thank You


It's time for another Stamp Trio Challenge! This time, I will be using Avery Elle's newly released set Many Thanks. As last time, I will make 3 different cards using one stamp set.

For this first card, I wanted to go with golden/sunny tones, and some great contrast.

I started by creating my base from Avery Elle's Fog heavy cardstock. Since I wanted a top-folding card, I cut the sheet of cardstock in half to measure 4 1/4 by 11". I then scored it at 5 1/2", to create a standard A2-sized card. I cut a piece of white cardstock to 4 x 5 1/4 to create a front panel.

I started with the sentiment from the Many Thanks set and stamped it in Fog pigment ink (which matches the base cardstock) just a bit lower than the middle of the panel. Although fog is a gray ink, it actually has a warm, yellow undertone - which makes it a great match for the golden colors I wanted to use on the rest of the cardstock.

I pulled one of the sketchy circles stamps from Many thanks, and stamped it around the top of the panel using yellow, orange and pink pigment ink. I didn't use any particular pattern, I just stamped where there seemed to be some of empty space.

After letting the panel dry, I grabbed a piece of Avery Elle Fizz grosgrain ribbon. This ribbon matches the orange I used for the sketchy circles and it's a middle color that contrasts well with the fog ink. I adhered the ribbon to the bottom of the white panel, then adhered the panel to the card front with foam squares.

Lastly, I added two white enamel dots to the left corner of the card to add a bit more interest. I considered using gray enamel dots, but I didn't have any that matched the warm gray of fog pigment ink.

Supplies:
Stamp: Avery Elle Many Thanks
Ink: Avery Elle Pigment Ink in Fog, Fizz, Mimosa, and Raspberry
Cardstock: Avery Elle Fog Heavy Cardstock, Bazzill Marshmallow (white)
Avery Elle Fizz grosgrain ribbon
My Mind's Eye Charmed enamel dots
Scrapbook Adhesives Foam Squares

Monday, June 2, 2014

LF- Somebunny is on the way


This is the last card for my Stamp Trio Challenge. As with the first two cards, I've been using Lawn Fawn's Hello Baby stamp set.

I started by cutting and scoring a piece of MFT's Primitive Cream cardstock to measure 4 1/4 by 5 1/2 inches. Then, I cut out a piece of polka dot patterned paper from Lawn Fawn's Hello Sunshine 6x6 paper pad to measure 3 3/4 by 5 inches.

After adhering the patterned paper to the card, I wanted to make the colors a bit more subtle, so I added a piece of vellum.

For the center panel, I cut out the smaller banner from Lawn Fawn's Stitched Party Banners die set. I also cut out the stitched circle from the same die set, using plain white cardstock.  After stamping and die-cutting the two bunnies, I colored them using my Copics and adhered them to the circle with some foam squares. I stamped a small heart between the bunnies.

The sentiment started with die-cutting a banner from Simon Says Stamp's Folded Banner Die. After putting together the banner, I stamped the sentiment from the Hello Baby set and adhered it to the card with foam squares.

As a last touch, I tied a piece of light lilac ribbon to the top of the pannel and adhered it to the card.

Supplies:
Stamp: Lawn Fawn Hello Baby
Dies: Lawn Fawn Hello Baby, Lawn Fawn Stitched Party Banners, Simon Says Stamp Folded Banner
Ink: MFT Hybrid Ink in black licorice and hot fudge
Paper: Lawn Fawn Hello Sunshine 6x6
Cardstock: MFT Heavyweight Cardstock in primitive cream
Copics: W2, W4, W6, R81, R95
Doodlebug Sprinkles Lily White vellum
Scrapbook Adhesives Foam Squares
Pale lilac ribbon