Friday, January 31, 2014

Happy Bee Day~!

It's been so very cold and snowy here that I wanted to make a card that's bright and cheerful. Maybe it will magically bring us some warmer spring weather...

The biggest challenge in this card was the placement. I'd cut out all the elements individually and glued some of the backgrounds before I realized that the sketch I envisioned in my head just wasn't going to work.

A little bit of playing around and I got a card I'm happy with.

This week's Wednesday challenge at Simon Says Stamp is anything with Twine/string, so I'm entering this card.
Simon Says Stamp Wednesday Challenge Blog 


-Supplies-
Cardstock: Bazzill Atlantic (base), Neenah Tuscan Gold (scalloped oval), Bazzill Marshmallow (sentiment)
Paper: Project Life - Seafoam designer paper (orange), Basic Grey: RSVP (green)
Stamp: Tiddly Inks Happy Bee Day
Twine: Lawn Fawn Lemon single cord trimmings

Tuesday, January 28, 2014

Paper Smooches - SPARKS challenge

Paper Smooches has a new Sparks challenge to create a card using a designer draft sketch. This is my first time participating in a PS challenge, but I really love Paper Smooches stamps. It seemed like a no-brainer to join in.

I usually go with the flow on cards and don't plan out with sketches - though I probably should, as no plan sometimes ends up with a card I don't like. So, taking a sketch and turning it into a card sounded like a great challenge and a great way to practice.

Here is my card:
The bunny, heart and sentiment are from A little Lovin' stamp set (which, as I mentioned in my tools/supplies for beginners series is a must have!). The patterned paper is Fancy Pants Down by the Shore.

I had a left-over circle from my previous card, so I cut another circle inside of it to create a round border. I cut out a piece of vellum to be the same size as the border, and glued it together. Then, I used Bazzill's Marshmallow stock to cut a smaller circle that would be the background for the bunny. For the ground, I used a piece of scrap yellow paper. The sky was made with Ranger's Broken China ink stain.

To create the fun scalloped border at the bottom of the card, I used the Borders 2 die from Paper Smooches. 

I placed the bunny and heart on top with dimensional squares. The bunny and heart were colored in using watercolor pencils. I added a set of small dash-lines around the top of the card and a few small hearts with a pink pen.

Lastly, I used white gel pen to create a stitch border for the circle, and the card is done!

Monday, January 27, 2014

SSS February Card Kit - Thankful

I got my Simon Says Stamp February card kit today, and it looks very pretty. One of the things I'm most excited about is that the stamp set has flowers. I don't have very many stamps that have small flowers on them, so this is a real treat for me.

Onto the card:
I started by cutting out a round circle in the card base with my Bigshot. I glued a piece of vellum inside, then glued a piece of light blue patterned paper over the vellum, so a hint of blue would be peeking through the window.

After that, I cut 2 long strips of craft card stock and crossed them in the middle of the window. It looked a bit plain, so I used my gel pen to create a wood grain-like texture. I also added small brown dots around the outside of the window to create a little bit of contrast.

The flowers were stamped using Ranger Archival ink in Saffron (yellow), Hero Arts Soft Blossom (pink flower fill), Ranger Archival ink Rose Madder (outline) and Simon Says Stamp Green Apple ink (stems, leaves). I fussy-cut around them and attached them to the card with dimensional squares.

I created the window box by layering a piece of green paper from the kit on top of a white piece of Bazzill Marshmallow card stock. I stamped small blue dots with Hero Arts Soft Stone ink.

Lastly, I stamped the Thankful sentiment from the kit stamp set in Simon Says Stamp Dark Chocolate ink. I outlined the letters in white gel pen to make them stand out a little more.The final touch was a simple hand-drawn border, using a brown pen.

Sunday, January 26, 2014

Birthday Girl

Today, I have a birthday card to share.
This sweet card uses a stamp from Tiddly Inks: Cute as a Bug. It has an adorable image that just seems perfect for mailing to a birthday girl who happens to live a further away.


I created the base of the card from Bazzill's Java (Orange Peel) cardstock, and used a scalloped edge die from Borders 2 by Paper Smooches. It created a neat post-like edge that's similar to the scallop around the image. The image is colored with watercolor pencils and a water brush.

The background papers are from Little Yellow Bicycle: Fern & Forest Girl paper pad. It's a very feminine paper pad, that's not too young or baby-ish at the same time.

The white space on the bottom of the card is blank so the sender can write in the girl's name. If there's one thing that really impresses kids, it's seeing their name on a card. It makes the card that much more special.

The inside of the card is pretty simple, using the parcels from the Cute as a bug set. The sentiment is from Simon Says Stamp's Sketchy Banner Greetings.

Wednesday, January 22, 2014

SSS- Wednesday Challenge: Funny Card

Simon Says Stamp Wednesday Challenge Blog 

I'm participating in this week's Wednesday challenge. The theme is to make something funny, and I really wanted to try. The challenge is sponsored by Paper Smooches, and I happen to love their stamps, so that's what I decided to focus on.


And the inside:


What do you think about the melting snowman on the inside of the card? I used post-it tape to mask only the hat and the eyes of the snowman, then used a black marker pen to draw in the rest of the face. A little bit of color, and voila!

Materials used:
 - Paper Smooches: Swanky Snowdudes (snowman, and "you are" part of sentiment), Sentiment Sampler (warm thoughts), Good Gab (totally cool), Word Salad (dude, one of a kind)
- Bo Bunny Surprise 6x6 paper pad
- Simon Says Stamp Talk Bubbles 2 (thought bubble)
- Simon Says Stamp Merry Trees (trees)
- Simon Says Stamp White Woodgrain paper (card base)
- Watercolor pencils + water brush
- Ranger Archival ink in Jet Black and Aquamarine

Tools and Supplies for Beginners (part 3)

This is the last (and final) part of my tools for beginners series.

In the first part, I talked about cardstock, paper trimmers and adhesive. In the second part, I talked about stamps, ink and paper scissors.

7- Score Board
 Like the name implies, a score board makes it easier to score cardstock. You will find this very useful when you're making  and folding your own card bases. It's also useful when you want to create other kinds of paper objects such as decorative boxes that hold your cards or treat boxes.

I recommend Martha Stewart's Mini Score Board. You will generally only need the 6-inch score board for making cards - both because of the general card size, and because 6 inches is very easy to carry and store. The board comes with a bone folder, so you won't have to purchase an extra tool straight away.

I got the large score board as well just in case I wanted to make larger boxes. It happened to be on sale for 75% off, so it was a good deal. But I've yet to use it, so it's mainly just sitting in the back of my crafting closet.

8- Patterned Paper
 Patterned paper is a great way to add color and shape to your card, and it's also one supply that there are a HUGE variety of themes, sources and materials. Some patterned paper you can purchase is thin (like printer paper), while other kinds are thick like cardstock.

Patterned paper also comes in different sizes. You can use 12x12 scrapbooking paper, or buy the smaller 6x6 paper pads (which are cheaper and only require trimming a little). One great thing about 6x6 paper pads is that the patterns are scaled down, so you don't end up with large patterns (though there are times where you might want a larger pattern, too, so check out both 12x12 and 6x6 sizes when buying paper).

My first suggestion for patterned paper is to buy at least one solid "general" pack. This is your base pack that you can use for most occasions. I would recommend the following:
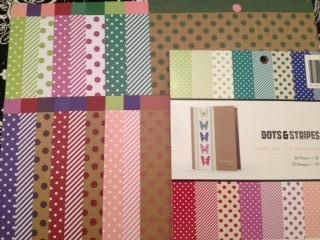
- Polka-dot and stripe paper pad, in various colors: Simple Stories Color Vibe pack
This is my second polka-dot and stripe pad. My favorite pad is the AC: Dots & Stripes 6x6 paper pad that I cannot seem to find online. I bought it at my local Target store, and I continue to buy it any time I see that they have it stocked. Its's a great basic pad with pleasant colors and a combination of white and craft base.
- Christmas-themed paper pad: BasicGrey 25th & Pine 6x6 paper pad
I originally got into card making because I wanted to make some Christmas cards for my family. I try to do something hand-made every year (besides the cookies, of course). I thought I was getting ready for the holidays early, but I quickly learned that Christmas is a HUGE cardmaking holiday, and that Christmas-themed supplies are quick to sell out as early as October. So, you want to have at least one holiday-themed paper pad that you can fall back on for those hand-made Christmas cards.
- One paper pad in your favorite color scheme, pattern or theme: Fancy Pants Memories Captured and Fancy Pants Down By The Shore
Sometimes it's fun to just have pretty paper that you just love and feel inspired by. If you're like me, you'll either buy it and never use it (Down by the Shore) or buy it and use it all the time (Memories Captured). Regardless, it's good to have a paper pad with your favorite things.
 - If you're on a budget, check out the Recollections Bold Basics at your local Michael's

 9- Embellishments
Embellishments are little bits and pieces you can add to a card as decoration. They come in many varieties: from stickers, to twine, to charms and more. And this is not counting some unusual crafty supplies that card makers can use!

The biggest challenge with embellishments is to find ones that match the rest of the card. A lot of companies have embellishments that match the colors and shapes of their paper packs, which is a huge help. But they can get a little pricey, so they're not always an option if you're on a budget.

My suggestion is to pick up a few of the following:
- Ribbon
I can pick up several yards of ribbon for 50 cents at my local craft store, and they have a HUGE variety of colors. A piece of ribbon can make a card pop or add a small feminine touch.
- Buttons
Like ribbon, you can find cheap buttons at the craft store or even at Walmart. I suggest getting a few neutral colors (white, black, brown, grey) at first, then moving onto colors and patterns. Look for button medleys that offer different sizes for the buttons, as this can make them very useful.
- Bakers' Twine
Thinner than ribbon, bakers' twine can add some visual interest to your card. You can also tie it around boxes for easy carrying or simple decoration.

10- Card Kit
I only recently signed up for Simon Says Stamp card kits (this is the current one), but it's been a really fun experience. Monthly card kits are a collection of papers, stamps and embellishments that coordinate together. SSS card kits also come with a few images of finished cards for inspiration. You do have to supply your own glue and ink, but that's usually something you have on hand anyway.

There's two big reasons why a card kit is useful. The first is that it has coordinating supplies. So you know that you will get a card base that matches the patterned paper, which in turn matches the sentiments and/or images from the stamp set.

The second is that it tends to have products you might not have otherwise picked up yourself. For example, January card kit came with these little paper tickets. I probably wouldn't have picked them out, myself, but they turned out to be just what I needed for this card.

There are several companies out there that make card and paper kits, and you might also find card kits in a store. I know Hero Arts has a few adorable card and tag kits, as does American Crafts. If you're just getting into card making and don't have many supplies, a card kit will give you the basic tools you'll need to make some awesome cards.

---
And that ends my supplies for beginners series! Thanks for reading, and hopefully it will help someone out there.

Thursday, January 16, 2014

Simon Says Stamp - January Card Kit Card #2


For my second card, I wanted to do something a little different, so I made a folder-like card.

The pink card tucks into the craft card base, and the round window allows you a little peek at the cute alien.

Here's how the card looks when it's tucked in.

And here's a close look at the pink card insert.

I tried a few new techniques in this card:
- The tabs were made using my We-R-Memory-Keepers envelope punch.
- The round window was cut with my BigShot, using the circle framelits die
- I cut a square of velum paper that came in the kit into a square and glued it to the back of the circle cutout. Then I stamped the stitched heart with Memento Luxe Love Letter ink.
- Although the little alien has a fantastic grin on the stamp, I wanted him to be a little more shy. So, I created a mask for his mouth from a piece of post-it tape. I drew the shy smile with a pen.
- I used watercolors on the alien, just to give him a touch of color.
- The many many stitch lines on the craft base use a white gel pen.
- The white hearts at the front of the base are from Lawn Fawn.

Sunday, January 12, 2014

Tools and supplies for beginners (part 2)

I'm continuing with my basic supplies for beginners series. Last time, I covered card stock, paper trimmer and adhesive. You can read the first part here.

4. Set of Clear Stamps & Acrylic Block

Clear stamps are very user-friendly. They allow you to see exactly where and how the stamped image/sentiment is going to be -- and this is awesome if you're like me and have a slight penchant for perfectionism. I do own a few red rubber cling and wood-mounted stamps. One of the wood-mounted stamps I own is of a Steampunk owl, so I do make use of it sometime. But overall, I reach for my clear stamps more often.

Like any other product, clear stamps can be made with a few different materials, and they have different properties (pros and cons, if you will).  

Acrylic clear stamps are soft and easy to clean. They also tend to be a little bit cheaper. They usually aren't stained by stamps. On the other hand, they can also make the ink bead up on them and stamp kind of splotchy and uneven, as well as occasionally not stick to the block properly. I prefer my stamped images and sentiments to be very crisp (think printer quality), so I get rather annoyed by the splotchiness.

Photo-polymer stamps are stiffer and offer a more precise stamped image. They leave a very crisp impression and they are sticky (so they stick to the block very well). They seem a lot more durable, and they don't usually have issues with ink beading up. However, they often will stain. Even after cleaning the stamp really well, it will end up with a slight tint. It's not something that affects the card itself, but it doesn't look as pretty.

I've found that I prefer photo-polymer stamps, overall. Many of my favorite companies use photo-polymer and I'm used to the best way to stamp with them (i.e. what ink to use, how much pressure to apply to the stamp, etc).


So, before we get into what stamps to get, I want to mention a really great  Lawn Fawn video that shows the basic way to use the blocks and clear stamps. One of the things you will notice they mention is that you will need a few acrylic blocks  -- and that you'll want several sizes because stamps themselves come in different sizes.

This is the blocks I use at the moment:
Inkadinkado Clear Acrylic Block: Small and Medium
They work well with all but my largest stamps.

And now the stamps... Just looking at all the gorgeous stamps out there is overwhelming. I have a ton of stamp sets, and I still keep finding more sets that can just fill in the gap or make a perfect card. But since this is about what to buy when you're just starting out, I'm narrowing it down to 4 must-have sets.

- Happy Everything from Lawn Fawn
This set has all the basic sentiments you might need for the major holidays and personal events such as birthdays, anniversary or graduation.
- Sentiment Sampler from Paper Smooches
This set completes the basic sentiments with messages that don't necessarily start with "happy" -- i.e sentiments like "miss you" or "get well".
- A Little Lovin from Paper Smooches
There's two reasons to get this set: a) It has the welcome baby sentiment, which isn't covered by either of the top sets, and b) It has character (i.e. animal) stamps. Not everyone likes using character/picture stamps (or coloring them), but they can make for some really amazing cards.
- Flower Stamp Set
This one is a bit different because there are a lot of different styles for flowers (not to mention lots of different flower types!). My personal favorite is Our Friendship Grows from Lawn Fawn, but it's a cutesy style that's not necessarily appropriate for cards that might make use of flowers (ex. sympathy cards). So, my advice is to find a good photo-polymer stamp that has the kind of drawing style you like.

5. Ink

Ink pads are another one of those areas where there is a HUGE variety of colors, types and formulas. I've gone through a couple of frustrating months where I thought my stamps were awful and defective, when it turned out that I was using the wrong ink. It took a lot of trial and error to finally figure out what brand of ink I should use to get the results I want.

Jennifer McGuire has a really good video that explains the different types of ink and their properties.

 As I mentioned, I like when my stamped images and sentiments are crisp and clean. Since I often use watercolor, I also like working with inks that are waterproof, as well as quick-drying and permanent. As a result, I gravitate toward dye inks. My favorite brand is Ranger Archival inks, as they are quick to dry and stamp very crisply. I'm also learning to like Shadow Inks from Hero Arts.

However, I also love the vibrant colors that pigment inks produce, so I have quite a few pigment ink pads as well.

My recommendations for ink pads are:

Dye Inks:
- Ranger Archival Jet Black Ink
This is the standard ink that's used on almost every card I make. Make sure you pick up some re-inker, as well, since it will be used often.
 - Ranger Archival Coffee Ink (and re-inker)
This is a great back-up neutral ink to use on cards where black would be too harsh or create too much contrast.

Pigment Inks:
- Hero Arts Unicorn White Pigment Ink
White ink is very useful for sentiments or images on darker paper. This ink is also fantastic for creating snowflakes. The drawback is that it's VERY slow to dry. I usually put the card away for a couple of hours to dry so the ink doesn't smear.
- Memento Luxe Love Letter Ink
A good red ink is hard to find, especially if you want a bright red and not something that leans too much toward orange or pink. So, I make use of Love Letter a lot when I want a nice punch of red.

6- Paper Scissors

I started out using any old scissor to cut paper and I didn't see anything wrong with that until I bought these scissors. Now, I can't imagine working on cards without them. Paper requires sharp and precise scissors, so you will want to have a pair that's dedicated only to cutting paper.

Not only are honey bee scissors very sharp (and I do mean really sharp... I've stabbed my palm with it on accident once and it was mucho painful), but they cut all the way to the very tip -- this is fantastic when you're cutting out complex shapes. The non-stick coating means you don't have to worry about scissors getting stuck to anything that might make cutting difficult.

-
That's all for now! I will continue on with the last 4 tools and supplies

Saturday, January 11, 2014

Simon Says Stamp -- January Card Kit Card 1

I signed up for the monthly card kit in December, and I made several cards with it. Unfortunately, in the busy busy busy Christmas season, I didn't get a chance to snap a picture before they were sent off.

I did, however, finally get my camera's battery charged and I managed to get a picture of the card I made with January's kit (which is sold out! Phew, I'm so glad I signed up for the subscription).

One of the things I wanted to challenge myself with while making this card was to use colors that aren't traditionally associated with Valentine's -- in this case, the ochre yellow and grey. And it made perfect sense with the little story I came up with as an inspiration for this card.

This card started out with the tickets. When I saw those tickets, the first thing that sprung to mind was an image of a shy boy asking a girl to be his valentine for the first time. I cut the yellow polkadot paper to look like a little pocket. I folded the side and bottom edges at 1/16th of an inch, which raised the pocket off the page a bit and gave me room to tuck in the Valentine tickets.

I used a black pen to draw in the stitching around the pocket and added a grey button to tie it in with the striped background. I drew more stitched lines in white gel pen, then stamped 2 stitched columns in saffron yellow ink.

Lastly, I stamped a little red heart with Memento Luxe Love Letter and drew stitch lines around it.

The sentiment is at the very bottom, small and shy (just like the boy is). I added a touch of red watercolor for emphasis.

And voila! A simple card that can be created again, and a secret sweet story to go along it.