Sunday, February 28, 2016

A touch of red


Today's entry is my quick-n-sneaky last-minute entry to The Greeting Farm's monthly challenge. The theme is a touch of red, so I pulled out some of my fun supplies to make a card.

I paired my red with browns and a pop of bright teal just to add a bit more interest. I also added some white polka-dots to the dress and hat band.

I kept the card super simple. A bold stripe pattern for my background, a bright red doily and enamel dots to tie in the red, and sentiment die-cut in gold.

Thanks for reading!
~Elle~

Friday, February 26, 2016

Starry Anya


Today's card features to fantastic stamp sets: The Greeting Farm's Starry Anya and MFT's Count the Stars.

Starry Anya is a very new addition to my crafty stash, but I just could not pass her up. I fell in love with her adorable hairstyle, dress and star accessories. She also happens to be in photopolymer - which was high quality and stamped great.

I colored Anya in with Copics. I went for a slightly darker blue for her dress, yellow for boots and stars and then a contrasting orange-red hair. I carefully cut her out with a pair of sharp scissors.

For my background, I used a piece of starry patterned paper that I trimmed to be just a bit smaller than my A2 card-base (4¼x5½"). I used a cloud die to cut a white panel for my sentiment. I stamped the sentiment in navy and adhered everything together.

My favorite part of this card is how all the elements came together. Everything is from different manufacturer, but it just fits together perfectly!

Thanks for reading~
Elle

Tuesday, February 23, 2016

Paper Orphans (project)

I love patterned paper. I have towers of 6x6 paper pads and probably more paper than I can use... But paper is what inspires me the most. Some people are inspired by cute stamps, ink or new techniques. It's all paper for me. I can look through a few of my favorite patterned sheets and I immediately feel like making something.

I make mainly A2-sized cards (4¼x5½") which means I cut my 6x6 paper down to 4". This leaves me with a 2x6" strip of paper that I have affectionately named a paper orphan (you know, separated from their family and all). I save all those strips in a large zippy mesh bag because I just can't bear to get rid of them. Of course, this means my collection of orphans is growing exponentially, and it's time to figure out what to do with it all.

One of the options is to just use it for die-cutting. I could cut some cute shapes, words and panels. 2x6" is not a very large canvas to work with, but it's perfect for tiny hearts, stars and circles - which there's never enough of in my stash. However, all of my tiny shape dies are for my BigShot, and cranking out set after set gets tiring (not to mention takes way too long because my orphan stash is massive...).

So, I decided to just work with the orphans and try to use them in a more conventional way - as accent paper for various card layouts. This seemed to work really well, especially since I tend to favor the clean&simple (CAS) style of card-making. This gave me a chance to test out a few layouts and figure out new ways to use paper.

I came up with several different possibilities, but the one I liked best is to use the patterned paper as a border and add a white cardstock panel on top. I could vary the border shape to create some interest, as well as choose which side it went on. With this in mind, I created several layouts and then tested making some cards...

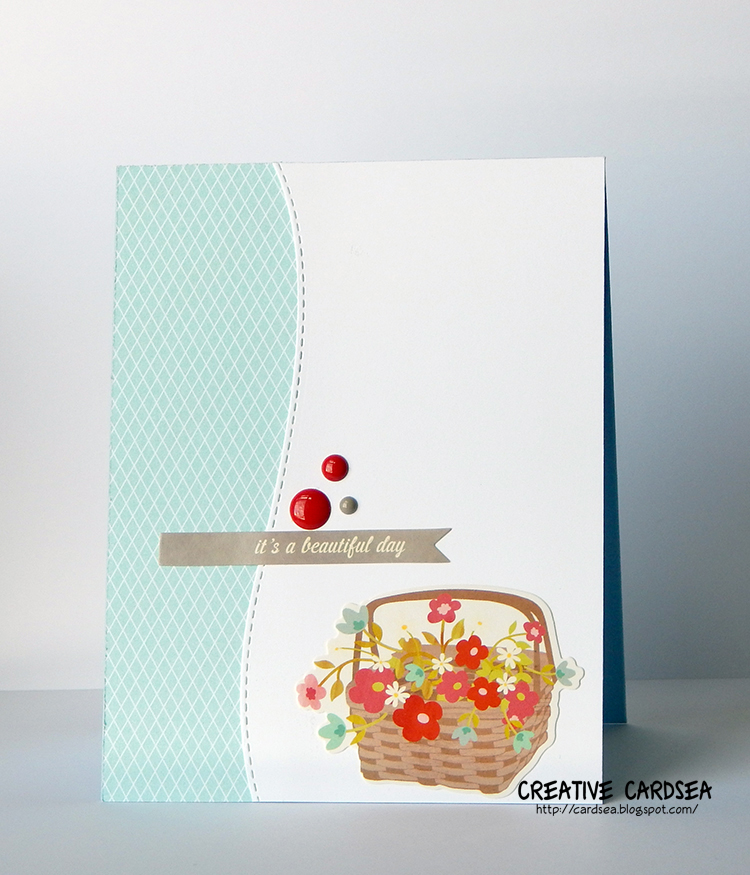
This first card was literally a "you have just one minute to make a card before someone walks in!" kind of card. I wanted to see if there was a super quick way to pull off a card using pre-made elements such as stickers, die-cuts or even stamped images I'd colored in advance. It worked great! The card was super simple to put together and having that pre-done base made it easy to choose all the coordinating elements.

With the second card, I took it a small step further and did a quick stamped and colored image. This made the card take just a tad longer, but it was still a pretty quick process - especially when it came to choosing colors. This is a great option for using up all the adorable little critter images. The layout gives them a way to shine without needing to set up a scene or get creative with die-cutting lots of extra panels.

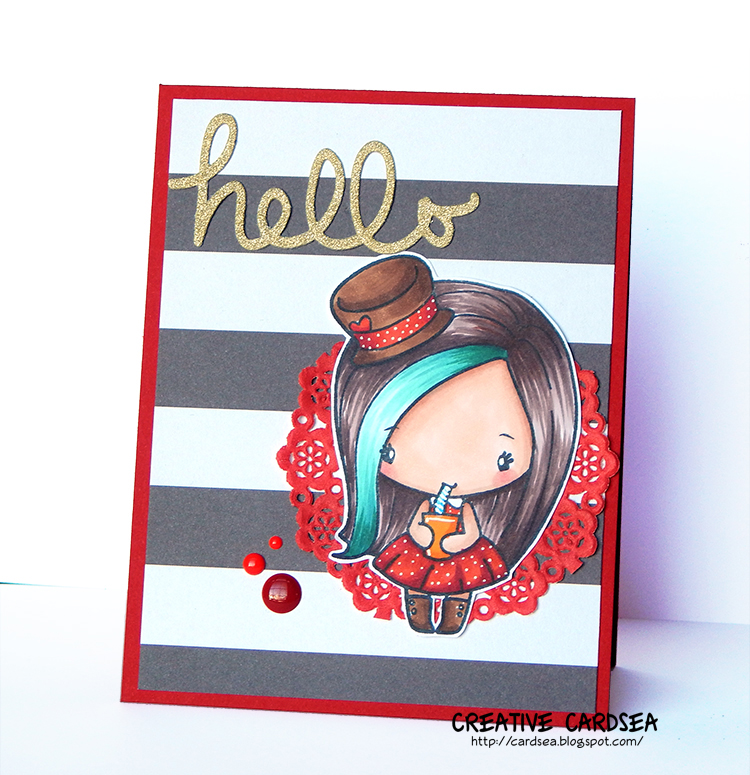
For the last card, I went all out with stamping Julie, Copic-coloring and fussy-cutting it out. It made the card a bit more elaborate, but it still has the same unified simple style. With a sentiment and embellishments, it made the card feel like it's my style - i.e. not at all like it was pre-planned and made in pieces.

I'm going to continue working on this project, finding new layouts and combinations that work together. I think that having a stash of ready-to-go bases will be helpful with those quick need-em-now cards, and I just love the idea of making full use of the materials I own.

Thanks for reading!
~Elle~

Thursday, February 18, 2016

Sneak Peek - Tobie


A quick little sneak peek of my project over at Some Odd Girl blog. I hope you'll get a chance to check it out! And do let me know what you think - I ventured onto a different path, color-wise. :)

Monday, February 15, 2016

SOG Angry Owl Digi Release

Hello everyone! Some Odd Girl is having a great new digi release in their store. This release features the very clever Smarty Cat and the adorable Angry Owl. For my card, I'm using Angry Owl - who looks a bit suspicious at what shennanigans you've gotten yourself into lately...

Come on... Admit it! You've been up to no good. Hmmmmm?

I kept my card super simple and focused on the owl, which I printed out to be slightly larger than usual. One thing that's great about digital stamps is that you can adjust the size of the stamp, so you can always have it fit the scale of your project.

I kept my coloring very simple, adding just a little depth and feathering texture by flicking the Copic marker, I did almost no blending, just letting the strokes become the texture on the image.

I found a great latte-toned stripe in my patterned paper stash. I trimmed it, then adhered it to a chocolate brown A2 sized (4¼x5½") base. I grabbed a lime-green mini doilie from my stash -- it matches the tones in the owl's eyes - and adhered it down. I added the owl on top with foam squares.

For embellishment, I busted out my Bo Bunny jewels. A combination of rhinestones and pearls, scattered around the card finished it off perfectly.

Thanks for reading!
~Elle~

Wednesday, February 10, 2016

Brief Hiatus

Today, we had to say goodbye to our cat. A couple of weeks ago, we took him to the vet because he wasn't acting like his usual self. He wasn't eating and he was very lethargic and sleepy. The vet discovered that he had an infection, which spread to his kidneys and put him in kidney failure. Since cats sometimes recover from acute kidney failure, we tried medication and iv fluids with hopes that it would kick-start his kidneys and get them going again.

Unfortunately, it did not work and we were faced with the difficult choice of putting him to sleep or letting him pass naturally. The problem with kidney failure is that it suppresses the cat's appetite. Our kitty would have died of starvation long before the kidney failure made him sicker. It sounded like an incredibly cruel and painful way to go. So, we opted to let him go more gently.

He was with us for 11 and a half years, and he was a great companion. He loved cuddles, hugs and being carried around. He made funny chittering sounds when he saw a bug, he sang when he was lonely and he licked faces, fingers and hands when he was happy.

We'll really miss him. And it's really rough trying to adjust right now.

I'm going to go on a brief hiatus from crafting and blogging, since my heart really isn't in it.

Thank you for reading and understanding.
~Elle~

Tuesday, February 9, 2016

ME-Be Mine


Today's card is another card in my Love card series. This time, I'm using Mama Elephant's Love from Above stamp set. This cute stamp set features some Cupids, along with sweet sentiments and cute mini details like flowers, hearts and arrows.

I wanted to play around with circle shapes with this card, so I die-cut a few stitched circles of varying sizes. I used white cardstock, since it seemed like a good neutral. I also cut a stitched banner for my sentiment- which I stamped in pink.

I stamped the bow-aiming Cupid onto some marker paper and colored him in with Copics. I kept the coloring super simple, since it's such a a small image. I then cut him out with a pair of sharp scissors, leaving a small white border.

I found a piece of patterned paper that looked very pretty, so I matted a pink top-folding A2 card base (4¼x5½") with it. I arranged my circles, making sure some of them overlapped. I adhered everything together, using a combination of my tape adhesive and foam squares.

As a last touch, I added a wood enamel button, a die-cut heart from the same patterned paper and scattered around a few enamel dots.

Thanks for reading!
~Elle~

P.S. I am setting this post to auto-post for me, as I'm a bit busy with a few things at the moment.

Sunday, February 7, 2016

Just a Kiss


Today's card uses a very unique stamp and die set from Die-Versions. I actually got this set (along with 2 other stamps and dies) during their sale a couple of years ago. But I happened to buy way too many stamps during that time, and this set got tucked away before it even got inked up. Since I've been rediscovering my stash, I figured I ought to use those wayward stamps. Unfortunately, I don't think this set is available for purchase anymore, but I plan on still giving it some good mileage and using it in a few cards.

I started by stamping out the cute kissing couple onto some marker paper and coloring them in with Copics. I chose simple colors and just did some basic shading. When I was done, I die-cut the couple with coordinating dies.

Since I used some red in my coloring, I decided to grab some of the red patterned paper. I don't have a whole lot of red in my paper stash, but I came across this fabulous bright pattern from Gina K.'s Here Comes the Sun paper pad. Aside from a great pattern, this paper is also slick, giving a bit of extra shine to the card.

I matted the patterned paper with some brown cardstock, then grabbed a piece of white cardstock which I die-cut with a stitched rectangle. I adhered the couple to the panel, slightly off-center, then tied a piece of gingham ribbon at the bottom. I matted the panel to a matching brown cardstock, using foam squares to add a bit of dimension.

I went all out on embellishments, scattering cute mini hearts and enamel dots around. I adhered everything together onto a top-folding A2 (4¼x5½") kraft card base.

Thanks for reading!
~Elle~

Friday, February 5, 2016

All Boy Valentine


Making a boy-themed Valentine card is pretty challenging! It can't be too mushy. It can't be too girly, and it most definitely can't be all pink. Or all red. Or all purple. What it can have is a boy, and blue, and not-so-girly border.

I started by stamping the adorable Oliver from The Greeting Farm's OA-Surprise stamp set onto some marker paper and colored him in with Copics. The fun thing about using a stamp like this is that you can personalize it with favorite colors. And you can still sneak in a bit of cuteness on the little present with polkadots.

The rest of the card was kept pretty simple. I added a strip of blue chevron patterned paper to the left side, and die-cut a notebook edge (die now retired)on a white cardstock panel. I adhered the two together and added Oliver with foam squares.

All that was left was the sentiment. I stamped a not-too-mushy sentiment in pink onto a banner die-cut and added it to the card. I sneakily added a couple sparkly pink enamel dots and the card was done!

Thanks for reading.
~Elle~

Wednesday, February 3, 2016

Enjoy Cupcake


Another quick card share today, as I'm absolutely swamped with things this week - though I'm hoping it will slow down a little next week. Today's card is a cute birthday card that's gender-neutral and could fit any age.

The adorable hamster stamp is from Stamping Bella - Birthday Hamster by Mo Manning. The sentiment is from Clearly Besotted's Say It In Style.

Thanks for reading!
~Elle~