Showing posts with label Kraftin Kimmie. Show all posts

Tuesday, July 18, 2017

SCS: Arthurian Legends

And here is the last of the SCS September 2016 theme I'll be sharing.

I love the myths and legends centered around King Arthur. I love the stories so much that I took 2 classes in college about King Arthur (and aced both of them). So, it's only natural that I would want to feature something Arthurian for the literally challenge.

Sir Galahad was just the perfect stamp to use, and I paired him with a sticker from Tim Holtz. I think I can use this card as a great masculine congratulations or birthday card. :)

Thanks for reading!
~Elle~


Friday, July 14, 2017

SCS: Love of Mythology

Kraftin' Kimmie Stamps - Athena (retired)

Continuing on with the SCS theme of literature...

Ever since I was really young, I've had a tremendous interest and passion for mythology. I started reading when I was very young (I could read by myself when I was 3) and some of the first books my mom bought me were encyclopedias of Greek and Roman mythology. I fell in love with the stories and continued to read about mythology from then on.

For this card, I used a stamp of Athena - goddess of wisdom, courage, justice and art. I set her against a patterned paper that had hand-written text on it. I kept everything clean and simple - to echo the ancient Greek architecture that featured a lot of pristine white.

Thanks for reading!
~Elle~

Friday, October 14, 2016

SK October: Red Witch

There's nothing more fabulous than a witch in a cute outfit, casting a spell. So, of course, I had to make sure I did some great coloring with today's card - featuring Kraftin' Kimmie's My Best Friends are Witches. I used rich reds and blacks for her outfit and made the spell-casting steam multi-colored.

I kept this card very clean and simple, so the focus was on the image. I just sprinkled a few shimmery sequins around - they reminded me of magical bubbles. I added a sentiment and set everything against a dark-colored cardstock.

Thanks for reading!
~Elle~

Tuesday, October 4, 2016

SK October: Witchy

It's October, and it's time to share the first card in my October Stash Kit - a fun and quirky little creation featuring Kraftin' Kimmie Stamps.  My Best Friends Are Witches was a stamp I was really excited to use. It has that perfect blend of fun, cute and whimsy - which makes it a fabulous card to color and use.

I colored the stamp with my Copics, opting for my favorite Halloween color palette - oranges, greens and purples. I added a bit of sea green and gray to the background and cropped the image. I matted the image onto some purple cardstock, then adhered it to a background from Doodlebug's Ghouls & Goodies paper.

The sentiment came from Batty and Catty, and I think it matches perfectly with the rest of the card.

Thank you for reading!
~Elle~

Saturday, October 1, 2016

SK September: Hello There!

This is the final card in September's Stash Kit project! This card feature's Kraftin' Kimmie Stamps' Let the Good Times Roll stamp set. I absolutely adored this image of a girl on a scooter and wanted to do it justice with coloring.

I opted for more natural/earthy tones for my coloring, both because it's appropriate to the season and because I wanted to do something different from my usual bright colors. However, I still brought some extra brightness by choosing a fun patterned paper and die-cut sentiment.

I used a white panel die-cut from a retired STAX die, and adhered the girl so her hair would be just outside the frame. I think this gave the card an extra sense of movement. A couple enamel dots, and voila! A finisher card complete.

Thanks for reading,
~Elle~

Wednesday, September 7, 2016

Stash Kit - KKS Love Bug!

Just a couple of posts ago, I shared my September Stash Kit- where I chose a selection of supplies to use for cards throughout the month. I've taken a couple of weeks to make some cards, and now it's time to start sharing them!

For today's card, I used Let the Good Times Roll stamp set from Kraftin' Kimmie Stamps. I also used the sketch that was provided for the month of August.

To make my card a bit more interesting, I angled the patterned paper and die-cut it with a stitched rectangle die. I think this added a bit of extra interest to the background and kept it from looking too straight.

Thanks for reading!
~Elle~

Monday, August 22, 2016

September Stash Kit

This is my Stash Kit for the month of September. Since September is the beginning of fall, I decided to go with fall-themed goodies that weren't centered around Halloween or Thanksgiving. For the first kit, I gave myself a lot of choices - probably more than I really needed. But my goal is to make at least 1-2 cards with each stamp set.

I chose 3 rubber stamps:
The Greeting Farm - Anya's Day Out (part of Super Secret Stamp Club #9)
The Greeting Farm - OA - Journey (Oliver and Amelia line)
Kraftin' Kimmie Stamps - Let the Good Times Roll!

And 3 photopolymer stamp sets:
Mama Elephant - Chance of Rain
Lawn Fawn - Into the Woods
Penny Black - Homemade

I chose one paper pad to focus on:
My Favorite Things - Fun & Frolic 6x6

And a few embellishments:
Lawn Fawn - Into the Woods Flair
Wplus9 - Autumn Splendor Blue enamel dots

I have also added a small baggie with random ephemera (some die-cut shapes, wood veneer and a couple of stray enamel dots), and enough card bases to make 12 cards.

Throughout September, you'll be seeing the cards I've made with my stash kit. I hope you'll enjoy them!

Thanks for reading!
~Elle~

Monday, March 28, 2016

Garden Thoughts

Today's card features Kraftin' Kimmie Stamps' Bloomin' Wonderful stamp set. This particular image is one of the stamps that made me fall in love with the style, and I've just been itching to use it.

I stamped the image onto some marker paper and colored her in with Copics. I went for light colors and some texture on the ground. After the image was colored in, I trimmed it down and matted it with a piece of grey cardstock.

I kept the rest of the card super simple - just a pretty piece of patterned paper with gray cardstock for matting and a few scattered enamel dots.

Thanks for reading!
~Elle~

Tuesday, February 23, 2016

Paper Orphans (project)

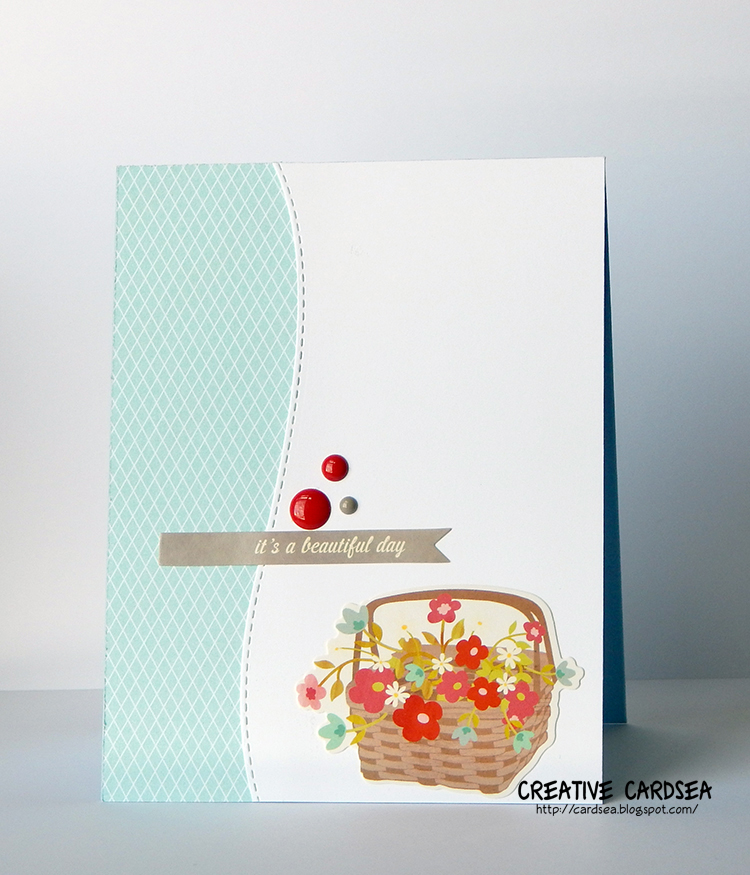
I love patterned paper. I have towers of 6x6 paper pads and probably more paper than I can use... But paper is what inspires me the most. Some people are inspired by cute stamps, ink or new techniques. It's all paper for me. I can look through a few of my favorite patterned sheets and I immediately feel like making something.

I make mainly A2-sized cards (4¼x5½") which means I cut my 6x6 paper down to 4". This leaves me with a 2x6" strip of paper that I have affectionately named a paper orphan (you know, separated from their family and all). I save all those strips in a large zippy mesh bag because I just can't bear to get rid of them. Of course, this means my collection of orphans is growing exponentially, and it's time to figure out what to do with it all.

One of the options is to just use it for die-cutting. I could cut some cute shapes, words and panels. 2x6" is not a very large canvas to work with, but it's perfect for tiny hearts, stars and circles - which there's never enough of in my stash. However, all of my tiny shape dies are for my BigShot, and cranking out set after set gets tiring (not to mention takes way too long because my orphan stash is massive...).

So, I decided to just work with the orphans and try to use them in a more conventional way - as accent paper for various card layouts. This seemed to work really well, especially since I tend to favor the clean&simple (CAS) style of card-making. This gave me a chance to test out a few layouts and figure out new ways to use paper.

I came up with several different possibilities, but the one I liked best is to use the patterned paper as a border and add a white cardstock panel on top. I could vary the border shape to create some interest, as well as choose which side it went on. With this in mind, I created several layouts and then tested making some cards...

This first card was literally a "you have just one minute to make a card before someone walks in!" kind of card. I wanted to see if there was a super quick way to pull off a card using pre-made elements such as stickers, die-cuts or even stamped images I'd colored in advance. It worked great! The card was super simple to put together and having that pre-done base made it easy to choose all the coordinating elements.

With the second card, I took it a small step further and did a quick stamped and colored image. This made the card take just a tad longer, but it was still a pretty quick process - especially when it came to choosing colors. This is a great option for using up all the adorable little critter images. The layout gives them a way to shine without needing to set up a scene or get creative with die-cutting lots of extra panels.

For the last card, I went all out with stamping Julie, Copic-coloring and fussy-cutting it out. It made the card a bit more elaborate, but it still has the same unified simple style. With a sentiment and embellishments, it made the card feel like it's my style - i.e. not at all like it was pre-planned and made in pieces.

I'm going to continue working on this project, finding new layouts and combinations that work together. I think that having a stash of ready-to-go bases will be helpful with those quick need-em-now cards, and I just love the idea of making full use of the materials I own.

Thanks for reading!
~Elle~

Tuesday, January 26, 2016

KK- Sending Hugs


And we continue on with the Love card series!

Today's card features a company that's new to me, but with an art style I just can't get enough of Kraftin' Kimmie Stamps. They're a company based in Canada and they had a sale a little while back during which I stocked up on quite a few stamps. They actually have several artists and lines, so it was really fun to look through all the different stamps and styles. You'll definitely be seeing more cards with these stamps!

Today's card uses the Hannah Hearts stamp. I stamped Hannah onto some marker paper with brown hybrid ink. I colored her in with Copics. I went with one of my favorite red combinations- red and grey. A touch of blue, purple hair and a pink heart finished off the image nicely. I made sure to add some warm grays to the floor, so she didn't look like she was floating.

I die-cut the image with a die from MFT (now retired) and matted it onto a piece of bright red cardstock. I found a patterned paper with a neutral kraft color and large white polkadots. I cut it down to 4x5¼", and matted it with a piece of red cardstock that was just slightly larger. I adhered both onto a top-folding A2-sized gray card base.

I added the image panel in the bottom right corner. Since I wanted to have a sentiment that was a bit different, I used some white letter stickers to spell out "hugs" and adhered them to a small strip of red cardstock. I die-cut "Sending" out of white cardstock and adhered it to the red strip. I added the sentiment to the card using foam tape.

As a last touch, I added a few enamel dots to tie in the grey and red colors.

Thanks for reading!
~Elle~