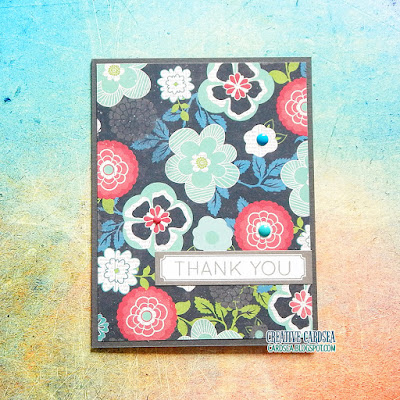
Friday, August 31, 2018

Tutorial: Autumn Stencil Background

Thank you for joining us on our LDRS Creative inspiration week blog hop! We are showcasing lots of gorgeous projects using products from our new release. You can even see them in action with step-by-step projects by our amazing designers on their blogs and our own LDRS Creative Youtube channel (make sure you subscribe)!
We have TWO new designer paperpads bursting of colours, with awesome patterns all ready for your projects called Happy Fall and Wicked, with a perfectly coordinated Wicked cardstock pack! There are EIGHT stamp sets that are simply fabulous: Winds are BlowingHappy Fall stamps, Happy Fall sentiments, Winnie Broomstick, Winnie Dracula, Winnie Magic, Fall Full O Leaves and The Magic of Fall sentiments! But wait, there is something brand NEW in the store, stencils! We have leaves and plaid patterns just in time to use with the NEW mini ink cube sets (Cobblestone and Jewelry Beads)! We also have new die sets that can be used as accessories or full backgrounds:  Spooky Hat, Punkin, Wicked Boot, Apple A Day and Autumn Breeze Peek-A-Boo. And for the first time at LDRS Creative, you can grab them in bundles, because you KNOW you need them all!

Simply use the list at the end of the post to keep hopping!
Each day we are giving away a $50 LDRS Creative gift card to one lucky hopper! To enter leave a comment on each blog in the hop, plus follow us on Facebook and Instagram. Winners will be announced on the LDRS Creative inspiration blog on September 4th.
AND for the release event we are excited to offer some great savings!
Save 15% on the new release* and use code HAPPYFALL
(*Coupon valid until midnight EST 9/3/18)

For today's project, I have something special -- a full tutorial on how to create a fun and unique plaid background! Grab a cup of coffee (or tea) and settle in for some fun!

The first step in this tutorial is to grab a piece of masking paper. I used the LDRS Creative Stamping Mask Paper - which is very thick and sturdy. I wanted a sturdy paper, in particular, because I could reuse it on a couple of cards and not have to worry about my ink bleeding through.

The next step was to die-cut some shapes with your dies. I wanted to use circles, so I grabbed a variety of circle die sizes from my die stash. You can just as easily use other shapes you have available - or even stick to cutting one die out several times. To get just the right placement, I die cut the circle shapes out of scrap cardstock first and played around with the placement. When I had the layout I was happy with, I ran the masking paper through my die-cutting machine.
 

Next, I peeled off the masking paper backing and added it to a white A2-sized panel. Then, I added the gorgeous Plaid stencil on top and secured it with some painters' tape.

Now it's time for that craft room workout session: ink blending! I used the rich mini inks in the Jewelry Beads set - but you can use any ink you might have in your stash. What drew me to the palette in Jewelry Beads was how rich and bright the colors were, and I thought they looked just perfect for an autumn card.
 
And here's the fun part -- removing the stencil and the mask! I love this step as it always feels a little bit like magic. Once the stencil and the mask are removed, you're left with a CAS background that's visually interesting and draws the eye in.

I finished off my card by adding a stunning image from the Winds are Blowing stamp set that I colored with my alcohol markers. I added a sentiment in Raven Hybrid ink and scattered a few enamel dots for embellishment

Hop along and leave a comment so you could win!
Day 3:
And make sure to be back tomorrow for more inspiration!

Thursday, August 30, 2018

Happy Fall

Thank you for joining us on our LDRS Creative inspiration week blog hop! We are showcasing lots of gorgeous projects using products from our new release. You can even see them in action with step-by-step projects by our amazing designers on their blogs and our own LDRS Creative Youtube channel (make sure you subscribe)!
We have TWO new designer paperpads bursting of colours, with awesome patterns all ready for your projects called Happy Fall and Wicked, with a perfectly coordinated Wicked cardstock pack! There are EIGHT stamp sets that are simply fabulous: Winds are BlowingHappy Fall stamps, Happy Fall sentiments, Winnie Broomstick, Winnie Dracula, Winnie Magic, Fall Full O Leaves and The Magic of Fall sentiments! But wait, there is something brand NEW in the store, stencils! We have leaves and plaid patterns just in time to use with the NEW mini ink cube sets (Cobblestone and Jewelry Beads)! We also have new die sets that can be used as accessories or full backgrounds:  Spooky Hat, Punkin, Wicked Boot, Apple A Day and Autumn Breeze Peek-A-Boo. And for the first time at LDRS Creative, you can grab them in bundles, because you KNOW you need them all!

Simply use the list at the end of the post to keep hopping!
Each day we are giving away a $50 LDRS Creative gift card to one lucky hopper! To enter leave a comment on each blog in the hop, plus follow us on Facebook and Instagram. Winners will be announced on the LDRS Creative inspiration blog on September 4th.
AND for the release event we are excited to offer some great savings!
Save 15% on the new release* and use code HAPPYFALL
(*Coupon valid until midnight EST 9/3/18)


Although I'm super excited about the entire autumn release, the moment I set my eyes on the Happy Fall stamp set, I was head over heels! Not only does this set feature adorable autumn mice, owl and bunny, but there's also a few accessories and some lovely sentiments that are perfect for autumn cards. You'll definitely see more of this set in my autumn card series!

I decided to keep this card very CAS - with just a few details to make the adorable images shine. I added a strip of patterned paper from the Happy Fall paper pack, along with a skinny strip of black cardstock. I think this really grounds the card and helps balance out the white space of the front panel.

After stamping out the mouse and owl, I colored them in with my alcohol markers and fussy-cut them out. Like yesterday, I used the Coffee Bean mini ink cube from the Cobblestone collection. I cut a little rectangle of white cardstock and blended a quick blue background to help the focal images stand out. I adhered the mouse and the owl with foam squares, and added the panel to the card front at an angle.

A simple sentiment and a couple iridescent sequins helped tie everything together.


Hop along and leave a comment so you could win!
Day 2:

And make sure to be back tomorrow for more inspiration!

Wednesday, August 29, 2018

Spooky Cute Winnie


Thank you for joining us on our LDRS Creative inspiration week blog hop! We are showcasing lots of gorgeous projects using products from our new release. You can even see them in action with step-by-step projects by our amazing designers on their blogs and our own LDRS Creative Youtube channel (make sure you subscribe)! 
We have TWO new designer paperpads bursting of colours, with awesome patterns all ready for your projects called Happy Fall and Wicked, with a perfectly coordinated Wicked cardstock pack! There are EIGHT stamp sets that are simply fabulous: Winds are BlowingHappy Fall stamps, Happy Fall sentiments, Winnie Broomstick, Winnie Dracula, Winnie Magic, Fall Full O Leaves and The Magic of Fall sentiments! But wait, there is something brand NEW in the store, stencils! We have leaves and plaid patterns just in time to use with the NEW mini ink cube sets (Cobblestone and Jewelry Beads)! We also have new die sets that can be used as accessories or full backgrounds:  Spooky Hat, Punkin, Wicked Boot, Apple A Day and Autumn Breeze Peek-A-Boo. And for the first time at LDRS Creative, you can grab them in bundles, because you KNOW you need them all!

Simply use the list at the end of the post to keep hopping!
Each day we are giving away a $50 LDRS Creative gift card to one lucky hopper! To enter leave a comment on each blog in the hop, plus follow us on Facebook and Instagram. Winners will be announced on the LDRS Creative inspiration blog on September 4th.
AND for the release event we are excited to offer some great savings!
Save 15% on the new release* and use code HAPPYFALL
(*Coupon valid until midnight EST 9/3/18)

My project for today features the adorable Winnie the witch, along with a fun witch's hat die.

I started by stamping Winnie from the Winnie Broomstick stamp set in Coffee Bean hybrid ink from the new Cobblestone mini inkpad collection. Stamping in brown gives the image a softer, more subtle look that always feels ideal for the fall. The mini cubes in the Cobblestone set are fantastic neutrals and definitely must-haves for your ink collection! They are super juicy and they work perfectly with alcohol markers, colored pencils and watercolor. I love having one inkpad for all the coloring mediums I own, and Cobblestone set really fits the bill there.

After I finished coloring Winnie, I got to work on my background. I chose a really fun spider pattern from the Wicked paper pack, along with a striped purple paper for my witch's hat. Wicked features a slightly distressed style that looks like it has a lot of texture, so it's perfect for both modern and vintage looks.

I used the Spooky Hat die for the hat, using the patterned paper, black cardstock and a piece of shiny mirror cardstock to make my centerpiece panel and sentiment. I added it to the card base with some foam tape and adhered Winnie over the top.

With so much fun texture already on the card, I didn't add any other embellishments.


Hop along and leave a comment so you could win!
Day 1:

And make sure to be back tomorrow for more inspiration!

Tuesday, August 28, 2018

Jelly Hugs

Lawn Fawn - So Jelly

For today's card, I went in a nautical direction and made a fun little creation featuring the starfish and jellyfish from Lawn Fawn's So Jelly stamp set. I kept the palette fairly monochromatic - but I finished it off with some sparkly iridescent sequins that bring extra shine to the focal panel.

I also used one of my coveted Lawn Fawn wood veneer that has been sitting in my stash for ages. Since the veneer is retired, I hesitated a little about using it. It really fit the card, though, so I just had to add it in.

Thanks for reading.
~Elle~

Monday, August 27, 2018

Bits & Pieces: Best Wishes


A very quick share today for a bits-n-pieces card. I had these fun strips of paper floating around my desk, so I decided to whip out a quick card. For the sentiment, I used a sticker strip that came in an old card kit and a couple of enamel dots instead of brads.

Thanks for taking a look!
~Elle~

Sunday, August 26, 2018

Lumberjackin' Hello


Sugar Pea Designs - Timber

Have I mentioned that I absolutely adore the lumberjack from Sugar Pea Designs' Timber stamp set? I just love how happy he looks! So, I just had to add him to a simple hello card - featuring a woodsy masculine motif and a polaroid snapshot background.

Thanks for taking a look.
~Elle~

Saturday, August 25, 2018

Special Unicorn


My Favorite Things - Magical Unicorns, Sweet Birthday Wishes

Today's card is a special unicorn card. I decided to make a mini scene and give this bashful cutie a cake. And since unicorns are magical, I thought I could make some cute white grass for the cake and unicorn to peek out from.

I think it turned out so fun!

Thanks for reading.
~Elle~

Friday, August 24, 2018

One in a Melon

Simon Says Stamp - One Cool Pineapple

I just love punny stamps! Maybe I'm easily amused, but they really make me giggle - and the sentiments in One Cool Pineapple are no exception. What I love the most about this set is that it features some fun images and a lovely scripty sentiment style.

For today's card, I kept things really simple. Just a touch of Copic coloring and a few bits and pieces to tie everything together.

Thanks for reading!
~Elle~

Thursday, August 23, 2018

Birthday Shark

Lawn Fawn - Duh Nuh, Happy Happy Happy, Bokeh paper (retired)

Today, I'm sharing a birthday boy card featuring a shark and some fun bokeh effects. I think bokeh looks a lot like bubbles, and it matched up perfectly with the dangerous (yet cute) shark.

I had fun splattering a piece of black cardstock with some pearlescent paints, and I added a bit more color with my Sakura Soufflé pens (which made for a raised texture, too). I found the perfect "yay" puffy sticker in my stash and that tied everything together.

Thanks for reading!
~Elle~

Monday, August 20, 2018

Butterfly Thanks

Altenew - Lace Up

Today, my card is an ephemera-based card, using some bits and pieces from my stash. I found this great bright floral, as well as a lovely butterfly ephemera die-cut that I really wanted to put together on a card. I paired them with a simple gray stripe and an elegant sentiment from Altenew's Lace Up.

Happy Monday and thanks for taking a look!
~Elle~

Sunday, August 19, 2018

Rainy Miss You

Sugarpea Designs - Timber, Mama Elephant - Chance of Rain, Avery Elle - Handwritten Notes

Since I'd been toying with that idea of making a scene card, I finally bit the bullet and made one. I used a ton of different elements and combined several companies, but I think it turned out really fun. I played around with the card layout, too, and I think it looks really interesting.

Thank you for taking a look!
~Elle~

Saturday, August 18, 2018

Stay Awesome

My Favorite Things - (BB) Beast Friends, Essential Sentiments, Sugarpea Designs - Timber (tree)

Today, I thought I'd give a go to another masculine card - this time, an encouraging one. I was torn between creating a scene and just plain layering, so I opted for a semi-scene -- all the scene elements are still there, but it's simplified. I combined a couple of My Favorite Things stamp sets with a tree from Sugarpea Designs.

For embellishment, I dug into my wood veneer stash -- something I don't seem to use often, but really ought to. Just a couple stars and a bright blue dot tied everything together.

Thanks for reading!
~Elle~

Friday, August 17, 2018

Sweet Thanks

Neat & Tangled - Better Together stamp, Echo Park - Sentiments Word die

Today's card is a cute little thank you card featuring a couple adorable kiddos from Neat & Tangled's Better Together stamp set. I was drawn to this set because I loved the illustrations, and I can see how easy it would be to color the kids up to look like your own kids/grandkids. And the scripty sentiment words featured in the set (like hugs or hello) are ones that I can see myself using often.

I paired the images and the thanks die with a grid patterned paper and added a piece of purple-colored vellum for some extra texture/dimension. I finished everything off with a few enamel dots.

Thanks for reading!
~Elle~

Thursday, August 16, 2018

Bright Lounge Fairy

Some Odd Girl - Lounge Fairy digi, Avery Elle - Bottle It Up (sentiment, retired)

It's been absolute ages since I used a digital stamp, so I thought I'd give it a go with my favorite digi company-  Some Odd Girl. I just love Kristy's designs and this bright lounge fairy was no exception. I used the classic fairytale palette - pink, white, green and yellow, but I kicked it up a notch by adding an ombré color to her hair.

Since the image itself was so large and detailed, I kept the rest of the card really simple by combining a striped patterned paper with a scalloped edge white panel. A quick sentiment and a few enamel dots finished everything off just perfectly.

Thanks for reading!
~Elle~

Wednesday, August 15, 2018

Nurses make a difference

The Greeting Farm - Cheeky Nurse (retired), Simon Says Stamp - Stripe Greetings

I really enjoyed coloring the cheeky nurse for my previous project, so I thought I'd ink her up again and make another encouraging card. As with the other card, I combined a neutral color (grey) with a pop of white and red. I kept the layout very simple, as it highlights the stamp better.

Thanks for reading!
~Elle~

Tuesday, August 14, 2018

Welcome little 'coon

Mama Elephant - Rowdy Raccoons

The raccoon is back! This time, he's featured on a baby card. I used a palette of greens and blues, so this could be suited for a little baby boy, but just switching the color palette would make this into a girly card, too.

Thanks for taking a look.
~Elle~

Monday, August 13, 2018

Bits & Pieces: Daphne

C.C. Designs - Fairwee Daphne (retired)

Continuing on with a Bits & Pieces collection, this time I've used another retired Fairwee stamp from C. C. Designs. I paired her with a flat-back enamel pin and used a colored purple velum for the background panel.

Thanks for taking a look!
~Elle~

Sunday, August 12, 2018

CAS- Flower Thanks

Simon Says Stamp - Many Thanks stamp

I almost didn't share today's card because it took under a minute to make - but I actually really like how it turned out and I can see myself using a similar approach for other quick cards.

I really love this flower patterned paper and I've been hoarding it for ages now. I bit the bullet and trimmed it down to add to a card base, but just couldn't bring myself to cover it up much. So, I added a simple panel with the sentiment and a few enamel dots for extra texture. I think I might try this with other patterns I absolutely adore.

Thanks for reading.
~Elle~

Saturday, August 11, 2018

Hello Sweetie Pie

The Greeting Farm - Cheeky Cherry Pie (retired)

For today's card, I played around with some shapes and a palette I don't usually go for - yellow and green. I used My Favorite Things Blueprints 25 (retired) and a stitched circle die, along with a hello die. I paired the die-cut elements with a lemon patterned paper and added some enamel dots and word stickers to finish everything off.

Thanks for taking a look!
~Elle~

Friday, August 10, 2018

Bits & Pieces: Dream Big

PinkFresh Studio - Happy Things 6x6 (retired)

As most of my Bits & Pieces cards, I kept today's creation really simple. I used some patterned paper scraps and a few enamel dots for a very CAS card. I really like all the elements on this card, and I think it turned out pretty great.

Thanks for reading.
~Elle~

Thursday, August 9, 2018

Congrats Nurse

The Greeting Farm - Cheeky Nurse, Altenew - Lace Up

One of my friends recently completed her certification to become a Registered Nurse, and I wanted to celebrate the occasion with a card. I used Cheeky Nurse from The Greeting Farm and a sentiment from Altenew's Lace Up. I opted for brown tones with a pop of red.

Thanks for reading!
~Elle~

Wednesday, August 8, 2018

On My Mind

Avery Elle - That Bites stamp, Simon Says Stamp - Stripe Greetings stamp, Distress Oxide ink in Cracked Pistachio and Mermaid Lagoon

Avery Elle's That Bites is another stamp set that I keep having great ideas for. In today's card, I used the bottom-dwelling Lanterfish, along with a sentiment from Stripe Greetings. To create an interesting background, I used some distress oxide inks. I mentioned before that I'm not sure how useful they'll be, but they've grown on me a little since then. I still don't like how messy they make my fingers/working surface, but they are very easy to blend and that works for those quick-n-easy cards.

Thanks for taking a look!
~Elle~

Tuesday, August 7, 2018

Flamingo Hello

Simon Says Stamp - One Cool Pineapple stamp, Flamingo die and Hello Friend stamp (retired)

It's still summery weather here, and that makes it a perfect day to share a flamingo card. This card was loosely inspired by a journaling spread I saw on Pinterest that featured a watercolor flamingo. Since I had a die that let me cut out the flamingo, I opted for my traditional Copic coloring and a bit of colorful stamping to add some extra interest.

Thanks for taking a look!
~Elle~

Monday, August 6, 2018

Hello Monkey

Waffle Flower - Willy stamp, Echo Park - Sentiments Word die

Waffle Flower has really been knocking it out of the park with their new releases lately. My wishlist for Waffle Flower stamps is growing, so I thought I'd use one of the Waffle Flower stamps I already own to make a quick and easy "Hello" card.

I paired Willy (the monkey) with a scripty Hello and used a few enamel dots to tie the patterned paper with the design. I think it turned out pretty cute.

Thanks for reading!
~Elle~

Sunday, August 5, 2018

Bike Adventure

Mama Elephant - Rowdy Raccoons

With my stamp stash all clean and organized, it's time to go back to sharing cards! For today's card, I used Rowdy Raccoons again from Mama Elephant.  This stamp has definitely gotten a lot of mileage from me, and I've still got plenty of ideas for it -- something that makes me very happy.

While organizing, I found a whole bunch of supplies I really wanted to use. Some are stamps that haven't been inked up, and others are fun goodies like ribbon, stickers and interesting patterned paper. I'm really excited to see what I'll come up with for them all.

Thanks for reading!
~Elle~

Wednesday, August 1, 2018

Brief Hiatus (Cleaning)

As you may have noticed, there haven't been any card posts for the past few days. I am currently deep in the trenches of organizing and cleaning out my crafty space and storage. And, of course, cleaning and organizing means no time to make cards.

I'm excited because I've been working hard on decluttering my space and I have a hefty bundle of supplies I'm ready to pass onto someone else. I haven't decided yet if I'll be selling or donating my destash goodies, but I am looking forward to having a more manageable supplies section.

I found a whole bunch of things I am itching to use, so expect some fun new projects in the near future.

Posts will resume this weekend!
~Elle~