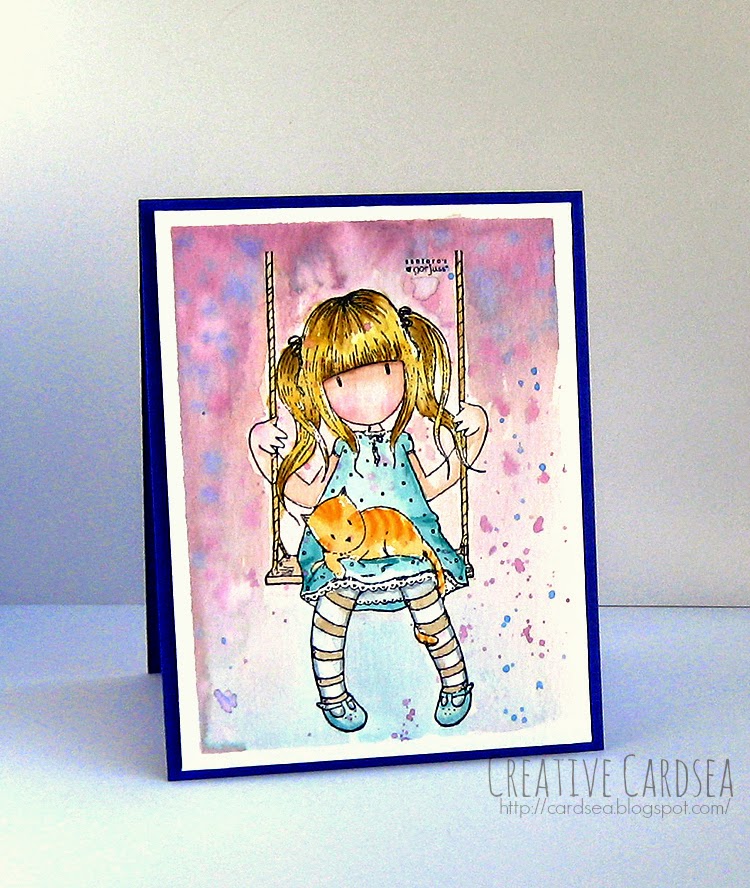
Today's card was inspired by my friend Kylie. She recently posted two wonderful cards that use the Ruby stamp from Gorjuss. Since I recently got that stamp set, I figured I should play with it too! So, here's my card. :)
I started by stamping the stamp onto a piece of Tim Holtz distress watercolor paper. I taped it down with painters' tape so it wouldn't warp too much - and also because it leaves a lovely white border around the card.
I colored the image with my distress markers and water. My method is to scribble the marker onto a flat plastic palette, then use a wet brush to pick up the color. I prefer this method over using an acrylic block because it keeps the mess contained, and gives me several compartments for the different colors. Plus, the white makes it easier to see some of the lighter/more subtle colors.
I started by coloring the skin. I used Tattered Rose to quickly color in the skin, and used Worn Lipstick for a bit of blush on her cheeks. After the skin was completely dry, I used some Vintage Photo to put a bit of shadow under her bangs.
For her dress and shoes, I first did a light wash of Evergreen Bough, then brought in some Peacock Feathers to deepen the shadows. While that was drying, I colored in her hair. I started with a wash of Squeezed Lemonade across the entire hair. I then brought in Wild Honey around where the shadows would hit and let it dry. Lastly, I used some Brushed Corduroy in just a few areas where the shadows would be the darkest.
I moved onto the kitten. I used a combination of Squeezed Lemonade and Spiced Marmalade to get a base coat. Once that was dry, I drew in the kitten's stripes with the Spiced Marmalade marker. I softened it a bit by brushing over it with a bit of water.
I finished up with her tights and the swing. After the girl was dry, I created the background by mixing several light washes of color - pinks, purples and blues. Lastly, I loaded the brush with color and flicked it over the picture for some spatters.
Once the entire panel was dry, I peeled off the painters' tape and trimmed the watercolor paper to measure 4 by 5 1/4". I created the card base from Simon Says Stamp's Blue Violet cardstock by cutting and scoring it in half for a standard A2 top-folding card. I adhered the watercolor panel to the card base using lots and lots of foam tape.
Supplies:
Gorjuss' Ruby stamp
Fiskars Compact Stamping Press
Tim Holtz Distress Watercolor Paper
Painters' Tape
Distress markers (Tattered Rose, Worn Lipstick, Vintage Photo, Evergreen Bough, Peacock Feathers, Squeezed Lemonade, Wild Honey, Brushed Corduroy, Spiced Marmalade, Gathered Twigs, Weathered Wood, Ripe Persimmon, Salty Ocean, Dusty Concord, Seedless Preserves, Tumbled Glass)
3M Scotch Double-Sided Foam Tape
Simon Says Stamp Heavyweight 100#lbs Cardstock in Blue Violet


Elle, you are awesome! I'm thrilled you played with Ruby. She looks amazing. I love how you went for such lovely soft and happy colours rather than the "gothic" type colours the Gorjuss girls are known for. The background is gorgeous. Wish I could have achieved such a wonderful look. More practice for me. lol I also thought it was interesting that you scribble your ink into the palette and a much better idea than scribbling straight onto the kraft sheet like I do. :) She's just beautiful Elle! Makes me want to try again and go for that prettier, softer look.
ReplyDeleteThank you, Kylie! I was so tempted to go with a darker, more gothic look like the packaging. But I threw caution to the wind and went with soft. And I'm so glad it worked!
DeleteI tried scribbling the marker onto acrylic blocks and my craft sheet before, but sometimes I'd end up messing up the colors. I really like how the palette keeps the colors clean and contained. Plus, since it's a flat palette, the color goes on quick and smooth with either the marker or the edge of an inkpad.
The background was one of those happy accidents. Basically, I was trying to do a splatter technique at one point, but the background was still really wet. So instead of a defined splatter, I ended up with a soft and diffused look. And now I can do it on purpose! Lol.
I'd love to see your soft version of the stamps! I bet you'd make them beautiful. :)